Register a SocialPilot Account
If you don’t yet have a SocialPilot account, you’ll need to register for a free SocialPilot account here.
Connect Plugin to SocialPilot
Before using WordPress to SocialPilot Pro, you’ll need to authenticate your WordPress to SocialPilot Pro installation to use your SocialPilot account. This ensures that WordPress to SocialPilot Pro can send status updates to SocialPilot when Posts are published, updated, reposted or bulk published, based on the Plugin’s settings.
- In the WordPress Administration interface, click on WP to SocialPilot Pro > Settings

- Next, enter your SocialPilot Username (Email Address) and Password, and click the Authenticate with SocialPilot button.
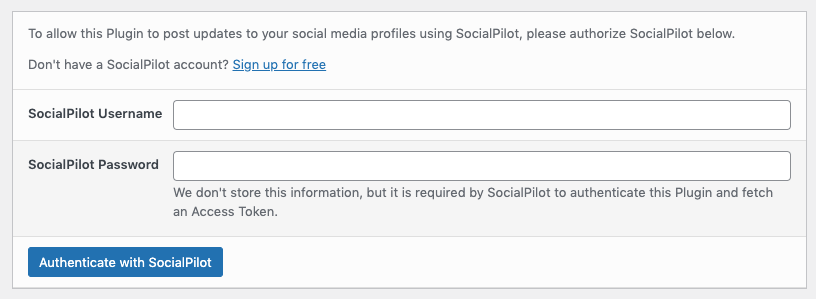
- If the process was successful, confirmation will be displayed on screen

Connect Social Media Accounts to SocialPilot
If your SocialPilot account does not have any of your social media profiles connected to it (for example, you’ve just registered an account with Hootsuite), you might be prompted to connect your social media accounts to SocialPilot:
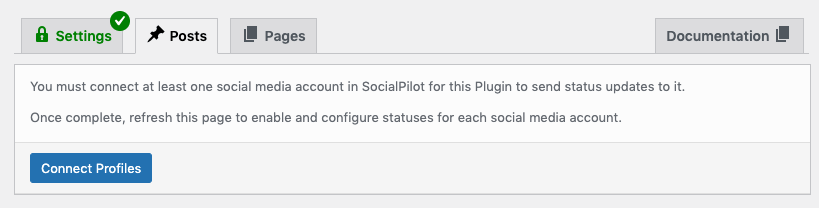
This is required, so that WordPress to SocialPilot Pro can then let you choose which social media accounts to send your status messages to.
- Click the Connect Profiles button
- Follow the on screen steps on SocialPilot to connect your social media accounts. You can also perform this step directly at https://app.socialpilot.co/accounts/create

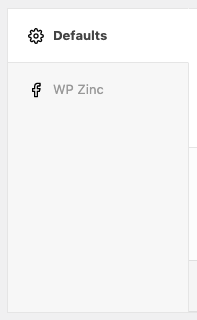
- Once complete, refresh the Plugin screen, and you’ll see the connected social media accounts listed:
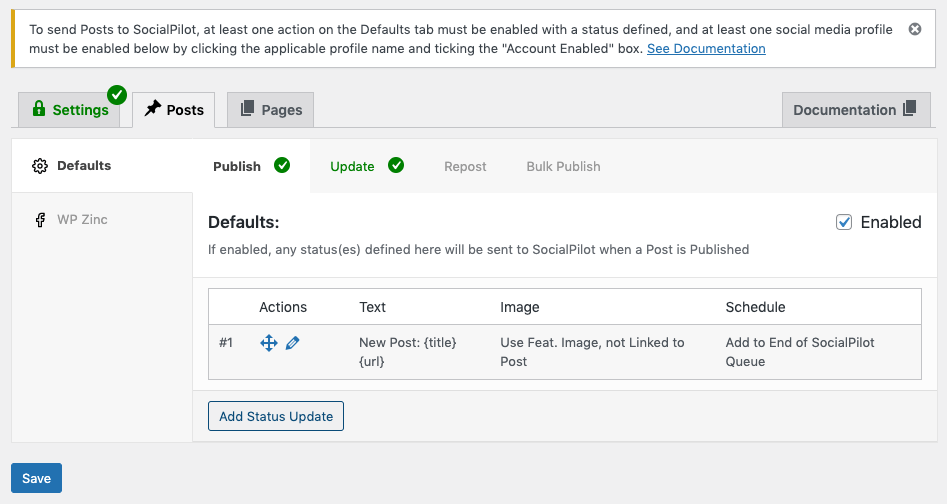
You’ll see a notice at the top of the screen, stating that at least one social media profile must be enabled. Continue reading for the next steps.
Enable Social Media Accounts
Finally, WordPress to SocialPilot Pro needs to be configured to tell it which social media profile(s) to send statuses to via SocialPilot.
- Click each social media profile in the left hand list of tabs that you want to post to:
- Tick the Account Enabled option

- Click the Save button
The warning message should disappear, and a green tick appear on the Posts tab, telling us that the Plugin has been successfully configured to send your WordPress Posts to the selected social media profiles via SocialPilot when you publish a WordPress Post:

For an in depth guide to configuring statuses, including how to configure different Post Types, actions and conditions, refer to the Status Settings Documentation.