
This guide refers to basic usage of Page Generator Pro with LiveCanvas. It is not a substitute for referring to the Generate: Content Documentation, which must be read first to understand all Content Group configuration options.
Prerequisites
Older versions may work, however the steps below may not reflect the available functionality.
- LiveCanvas Editor 4.6.1 or higher
Setup

Failure to follow all steps in this section may result in incorrect working functionality.
Before using LiveCanvas in your Content Group, you’ll need to:
- Navigate to LiveCanvas > Home
- Under Optional Extras > Enable LC on Post Types, tick / select
page-generator-pro
- Click the Save Settings button
Add a Content Group
To add a new Content Group to Page Generator Pro, click the Add New button below the Content Groups title, which can be found towards the top of the screen.
You will then be presented with a screen similar to the one used to edit your WordPress Posts and Pages:
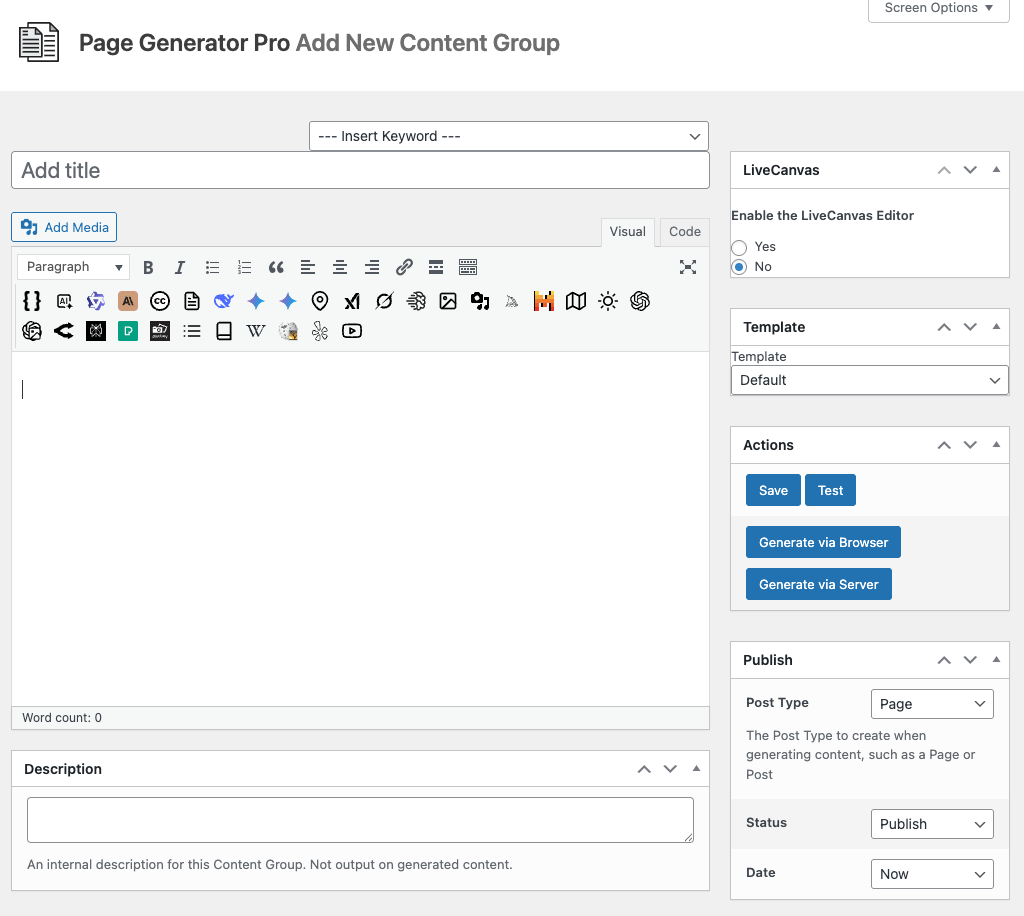
It’s recommended that you first:
- Define the Title,
- Setup the Content Group settings, by referring to the Generate: Content Documentation.
- Click Save
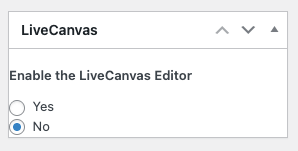
Once saved, enable the LiveCanvas editor in the meta box, and click Save
Once saved, click the Edit with LiveCanvas button:
Edit a Content Group
To edit an existing Content Group in Page Generator Pro, click the Title of the Group that you want to edit:
Click the Edit with LiveCanvas button:
Dynamic Elements
You’ll need to manually build each Dynamic Element’s shortcode using the documented parameters, ideally into a simple element such as LiveCanvas’ single paragraph element. These can be found in the Adding: Page Builders section of each of the Documentation links below:
Common Issues
Edit with LiveCanvas button missing
Follow the Setup section of this document.