Overview
The Generate Content section allows you to define one or more Content Groups (or Content Templates), which generate / produce Pages, Posts or Custom Post Type content.
Each Content Group you create is unique, and comprise of the Keywords, content and generation settings, such as the Post Type and number of Pages to generate.
You might use multiple Content Groups for different sections of your web site. For example, you might have one Content Group for generating Pages about the services your business offers for a list of locations, and a second Content Group for drip-fed blog posts.
From your Content Group, you’ll use the Generate functionality to then make Page Generator Pro generate your Pages, Posts or Custom Post Types.
To access your Content Groups, click on the Page Generator Pro menu entry in the WordPress Administration, and then click Generate Content.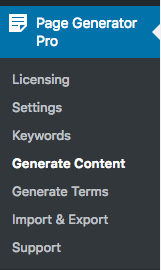
Add New Content Group
To add a new Content Group to Page Generator Pro, click the Add New button below the Content Groups title, which can be found towards the top of the screen:
You will then be presented with a screen similar to the one used to edit your WordPress Posts and Pages: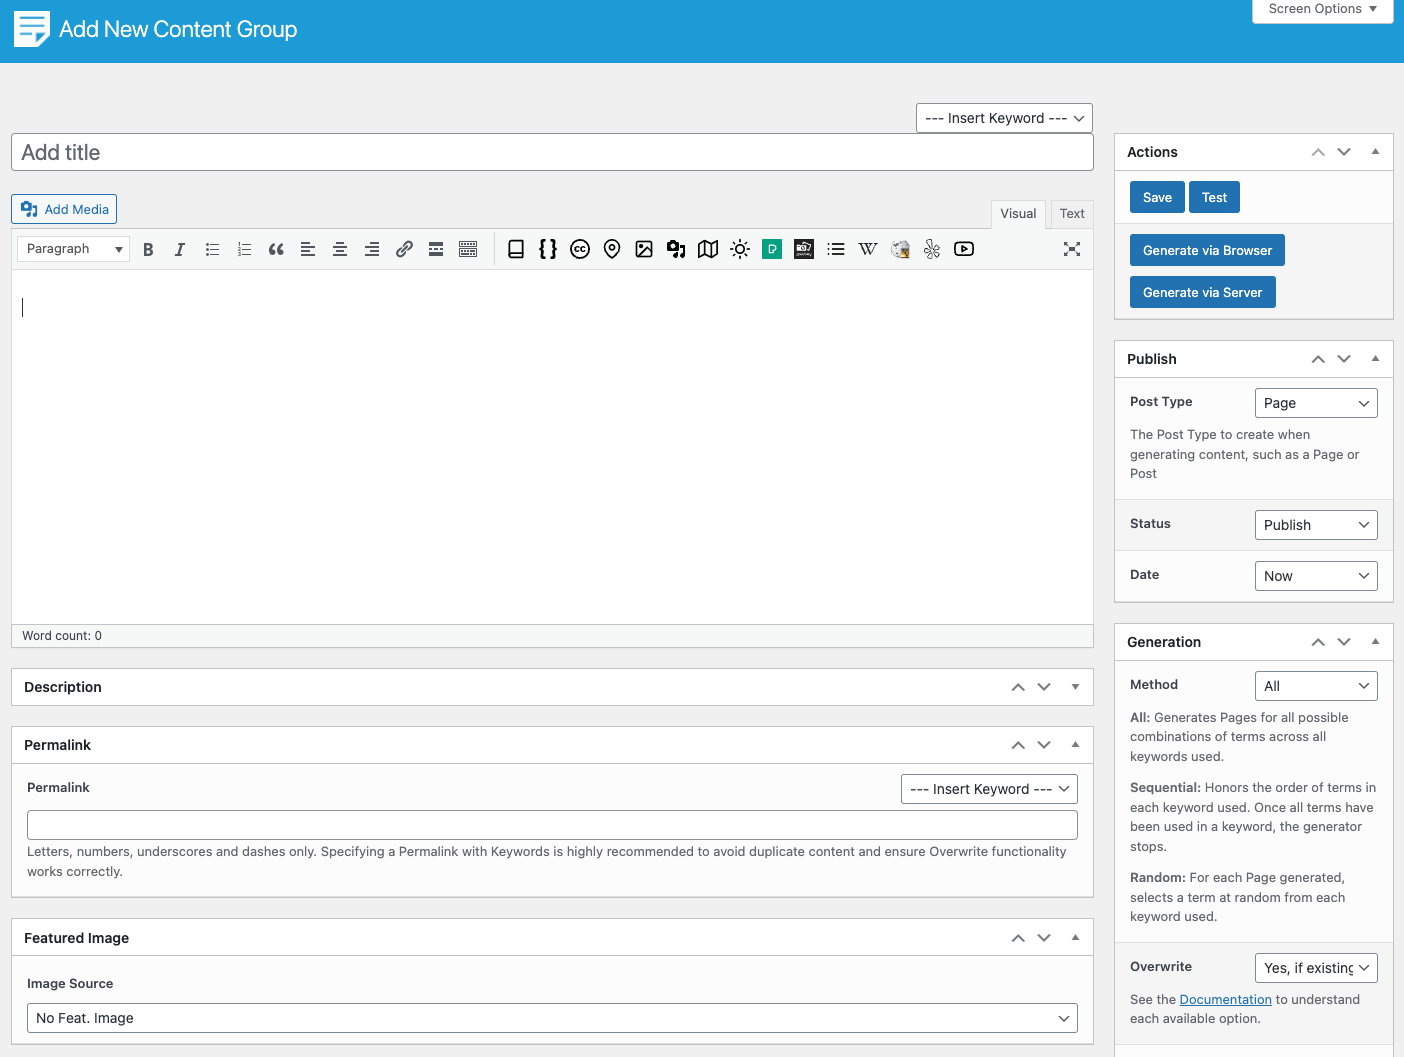
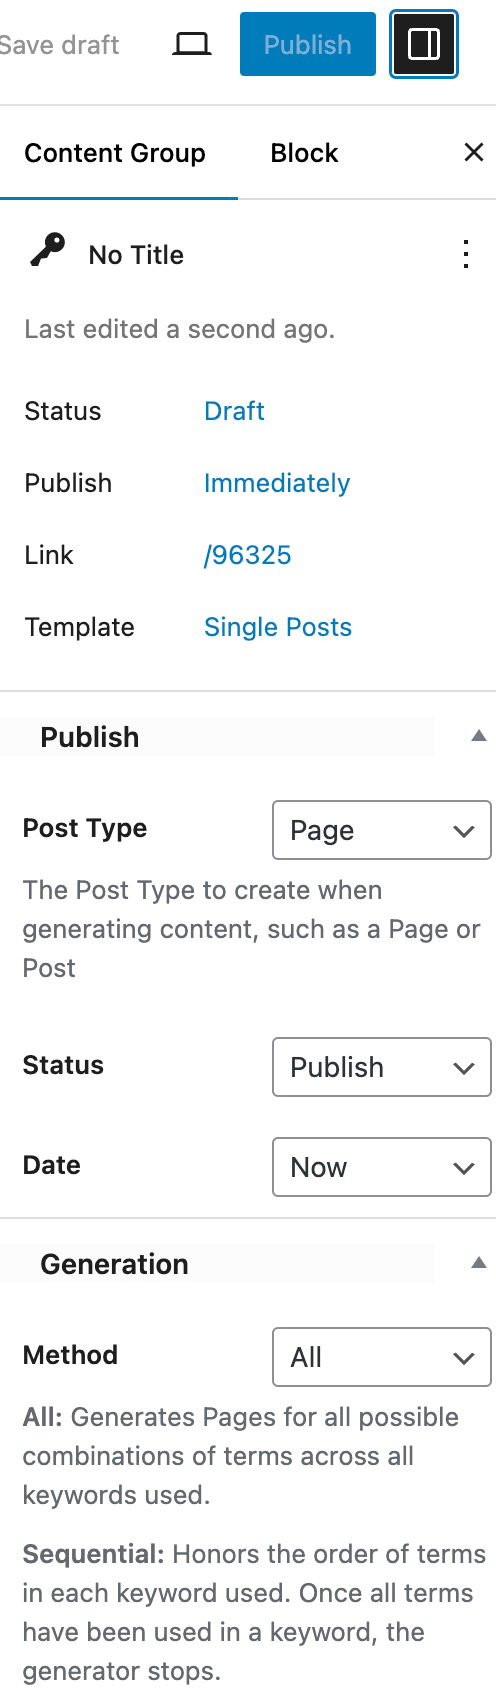
If you’re using the Block Editor (sometimes referred to as Gutenberg), you’ll see a slightly different interface: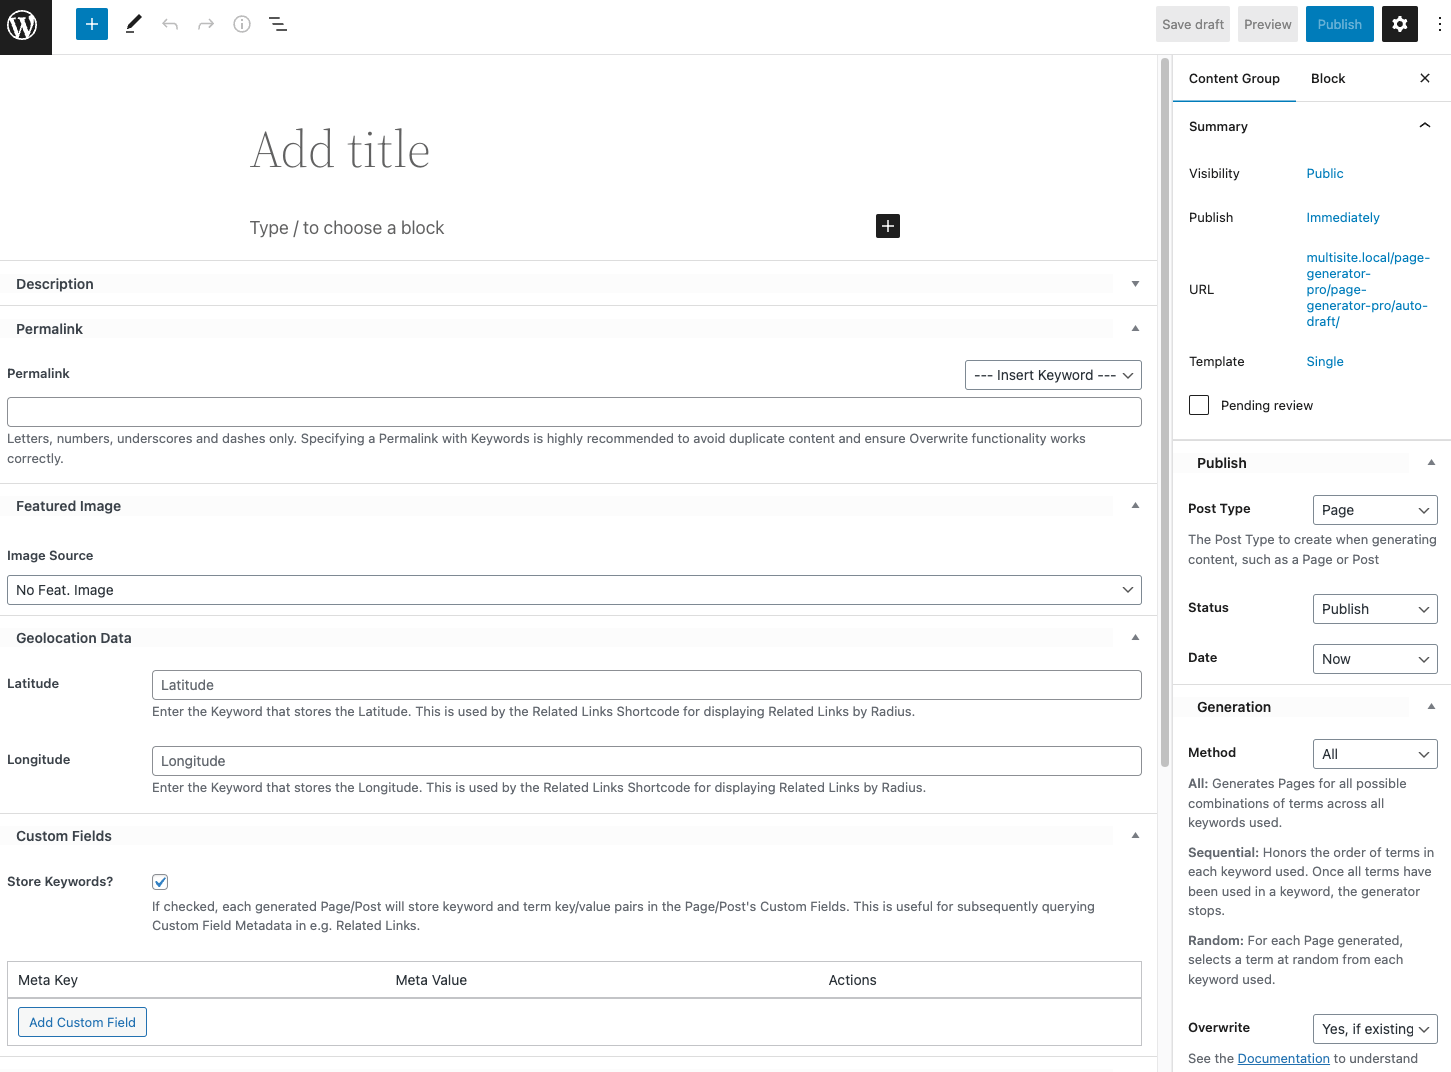
You’ll use this screen to:
- Define various fields, such as the Title, Content and Featured Image, which will be used for each generated Page / Post,
- Determine whether you want to generate Pages, Posts or another registered Post Type from this Content Group,
- How the Plugin should generate content.
Add New Directory Structure
The Add New Directory Structure functionality builds the necessary Keywords and Content Groups for a directory structure of locations and services.
To add a new Directory Structure to Page Generator Pro, click the Add New Directory Structure button below the Content Groups title, which can be found towards the top of the screen:
Start by selecting the required structure
| Structure | Directory Structure |
|---|---|
| Region (State) > County > City > Service | http://example.com/state http://example.com/state/county http://example.com/state/county/city http://example.com/state/county/city/service |
| Region (State) > City > Service | http://example.com/state http://example.com/state/city http://example.com/state/city/service |
| County > City > Service | http://example.com/county http://example.com/county/city http://example.com/county/city/service |
| City > Service | http://example.com/city http://example.com/city/service |
| Service > City | http://example.com/service http://example.com/service/city |
| Region (State) > County > City | http://example.com/region http://example.com/region/county http://example.com/region/county/city |
| Region (State) > City | http://example.com/region http://example.com/region/city |
| County > City | http://example.com/county http://example.com/county/city |
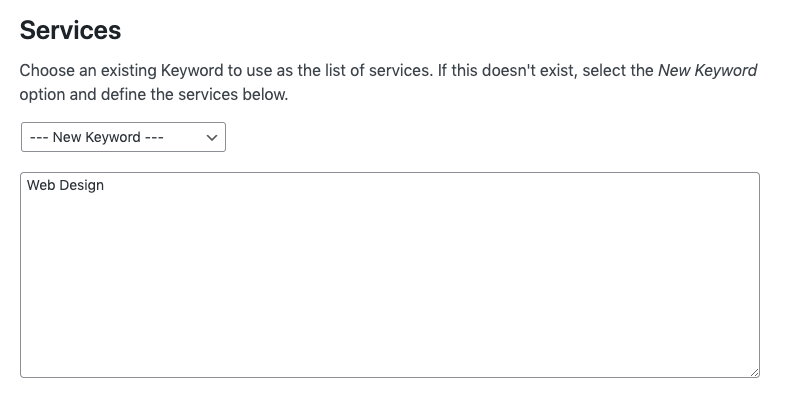
Next, select your existing Service Keyword, or enter the services in the text box.
Choose the Locations to include, either by Radius or Area.
Radius

The radius method will include all Locations that fall within the given Radius from the given ZIP / Postal Code.
This method is useful if, for example, you / your client offers services within a specific radius of your business location.
Area
The area method will all Locations that fall within the given area constraints.
This method is useful if, for example, you / your client offers products or services within a specific Region(s), County(s) or City(s).
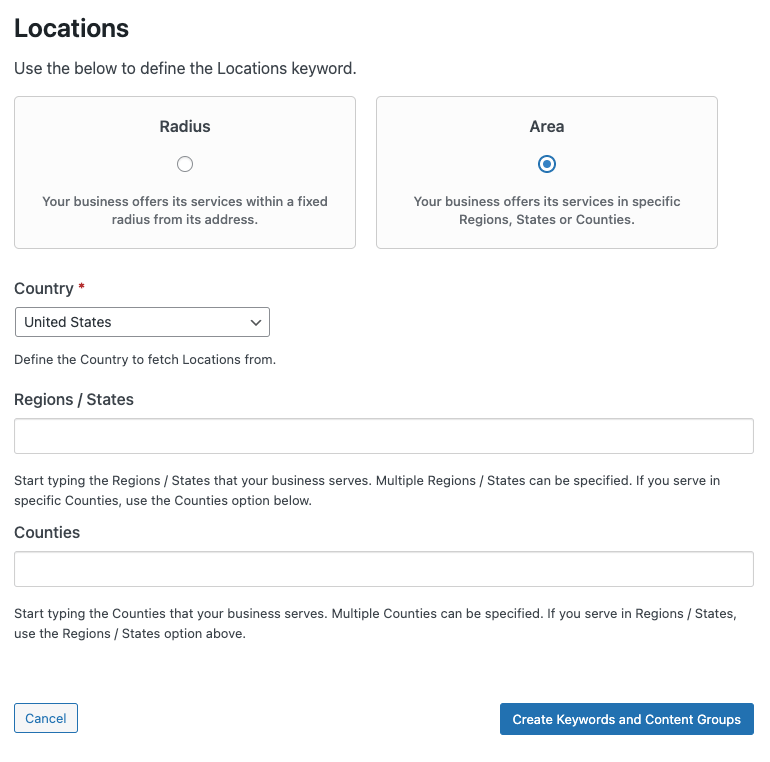
When using the Area Method, the following additional options are displayed:
| Setting | Description |
|---|---|
| Regions / States | Locations will be included if they match the given Regions (States). |
| Counties | Locations will be included if they match the given County(s). |
| Population | Locations will be included if they have a population within the given Population Limits. Leave blank to specify no limit. |
Exclusions Any Locations partially or fully matching the given strings will be excluded from the Keyword’s Terms. For example, to exclude Mobile Parks from Location results, you’d enter mobile parks.
Once Location data is configured, click the Create Keywords and Content Groups button:
Once complete, the screen will show:
- The Keywords generated/used
- The Content Groups that were created for the directory structure
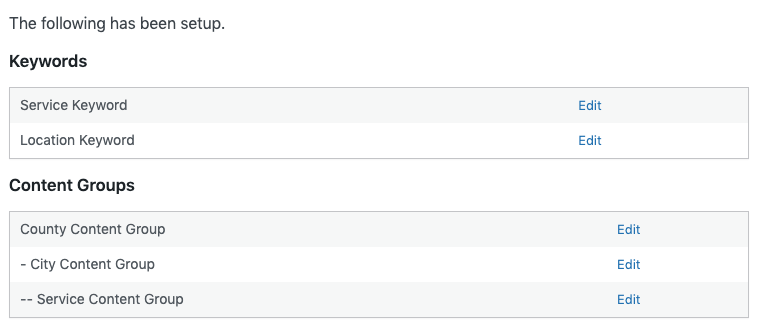
Proceed with editing each Content Group below, to define the necessary content.
Edit a Content Group
To edit an existing Content Group in Page Generator Pro, click the Title of the Group that you want to edit:
Delete a Content Group
Deletion of Content Groups in Page Generator Pro works in the same way that you would delete Pages or Posts, except you will be performing these steps at Page Generator Pro > Content Groups. Refer to WordPress’ documentation.
Import a Page, Post or Custom Post Type into a new Content Group
If you have already built your page layout in a Page, Post or Custom Post Type, you can import this into a new Content Group, make any necessary edits (e.g. adding keywords, spintax etc) and then generate your Pages from the Content Group.
This is particularly useful if your Page, Post or Custom Post Type was built in a Page Builder, and you’ve built a particular complex layout that you don’t wish to manually re-create in a Content Group.
To do this:
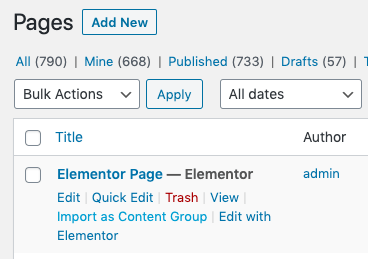
- Locate the Page, Post or Custom Post Type in the WordPress Administration interface
- Click on the Import as Content Group option
- A notification will be displayed confirming the Content Group was created from the Page
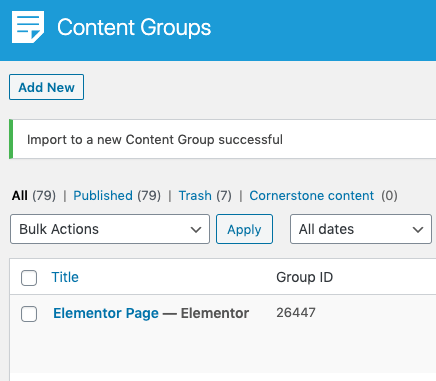
- Click the Title of the newly imported Content Group that you want to edit.
Duplicate a Content Group
If you want a new Content Group that’s almost identical to an existing one — same settings, same Page Builder layout, just with a few tweaks — duplicating saves you rebuilding it from scratch.
To duplicate a Content Group:
- Locate the Content Group at Page Generator Pro > Content Gruop
- Hover the mouse cursor over the Content Group in the table
- Click the Duplicate action link
The duplicate is created in draft status, regardless of the original’s status, so it won’t appear publicly or be picked up by Generation until you publish it.
Replace Keywords in Content Group

The option to replace keywords in a Content Group is available in Page Generator Pro 5.5.6 and higher, available Tuesday 23rd June 2026 23:59 UTC
To change Keywords in a Content Group — for example, you duplicated a “Plumbers” Content Group for “Electricians” and now wish to use different Keywords — the Replace Keywords tool does this without you having to hunt through every field.
To replace Keywords in a Content Group:
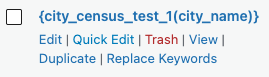
- Locate the Content Group at Page Generator Pro > Content Gruop
- Hover the mouse cursor over the Content Group in the table
- Click the Replace Keywords action link
A modal window opens that scans the Content Group and lists every keyword in use.
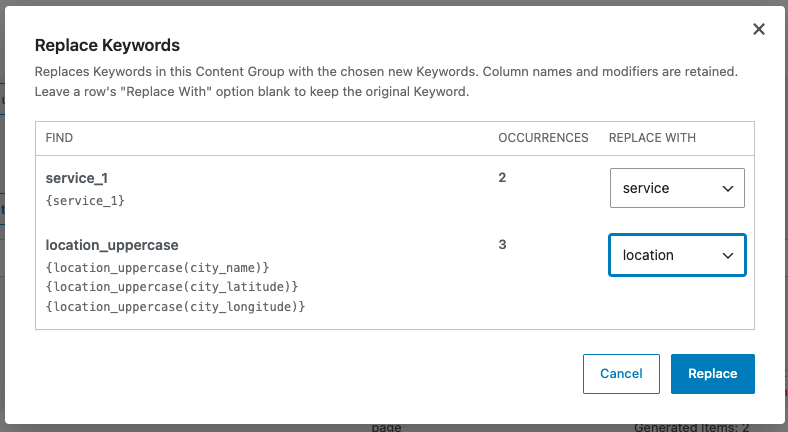
For each keyword detected, you’ll see:
- Find — the keyword name, plus every variant in use (such as
{location},{location(city)},{location:uppercase_all}). - Occurrences — how many times the keyword appears across the Content Group.
- Replace with — a dropdown of every keyword defined in your Keywords list.
Make your changes, and click Replace to apply your selections.
Column names and modifier suffixes are preserved automatically. {location(city):uppercase_all} becomes {new_keyword(city):uppercase_all} if you’ve mapped location → new_keyword. You don’t need to think about variants — they’re all handled.
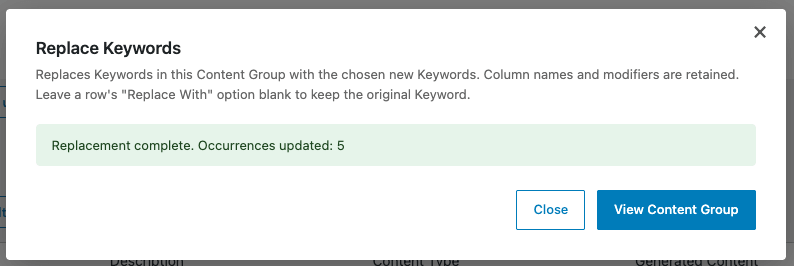
Once the replacement completes, the modal shows the total number of occurrences updated and offers two options:
- View Content Group — opens the Content Group’s edit screen so you can review the result.
- Close — closes the modal.
Fields: Gutenberg
If you are using Gutenberg, the fields described below can be found by:
- Scrolling past the content
- Enabling the sidebar, by clicking the sidebar icon
Alternatively, install the Classic Editor Plugin to use the pre-Gutenberg interface.
Fields: Page Builders
If you are using a frontend Page Builder, the fields described below may not be displayed. In that case, you’ll need to exit the Page Builder in order to load the Content Group in the WordPress Administration interface.
Once you’ve configured the fields, you can go back to editing the content in the frontend Page Builder.
Fields: Title
The Title for each generated Page, Post or Custom Post Type. Supports keywords, which can be inserted manually or by clicking on the relevant keywords below. A different keyword data item is then chosen for each generated Post.
The Content Group must have a title specified. Whilst many Page Builders don’t use WordPress’ title field, it’s important to set this to ensure:
- The Related Links Dynamic Element displays a title for generated pages,
- A Permalink is generated, in the case where the Permalink field is blank.
To set the Title, specify a Title in the Title field. If your Page Builder specifies its own title / heading to output the Page title, use that value in the Content Group’s title field.
Fields: Content
The content for each Page, Post or Custom Post Type. Also supports keywords, which can be inserted manually or by clicking on the keyword button within the Visual Editor.
Fields: Permalink
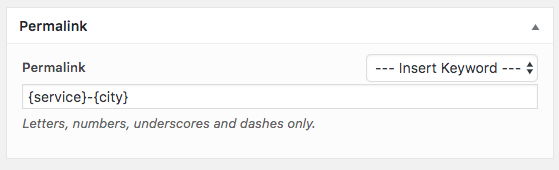
Automatically generated, but again can be manually specified with keywords. A different keyword data item is then chosen for each generated Post.
Permalinks must only contain alphanumeric characters, dashes, and/or underscores. No spaces.
When using Gutenberg, ensure that you are editing the Permalink field, and not the URL field: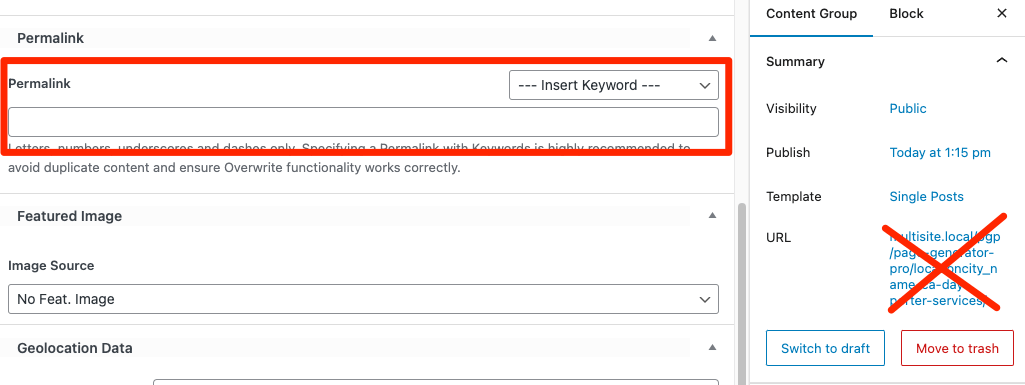
Fields: Excerpt

Allows you to specify the excerpt for each Post that is generated. Keywords can be used here by clicking the Insert Keyword dropdown, and clicking the keyword tag to use.
Fields: Featured Image
You can optionally assign a Featured Image to the Posts, Pages or Custom Post Types you’ll be generating.
Image Source

First, define the image source to fetch an image from:
- No Featured Image: Do not assign a Featured Image to the generated Page
- Creative Commons: Assign an image from Creative Commons to the generated Page, based on the given Search Parameters
- Featured Image from URL: If the Featured Image from URL Plugin is installed and active, assign an image based on the given image URL
- Gemini AI: Generate an image from Gemini AI, assigning it to the generated Page, based on the given Search Parameters
- Grok AI: Generate an image from Grok AI, assigning it to the generated Page, based on the given Search Parameters
- Ideogram AI Image: Generate an image from Ideogram AI, assigning it to the generated Page, based on the given Search Parameters
- Image URL: Assign an image based on the given Image URL
- Media Library Image: Assign an image from the Media Library to the generated Page, based on the given Search Parameters
- Midjourney: Generate an image from Midjourney, assigning it to the generated Page, based on the given Search Parameters
- OpenAI: Generate an image from OpenAI’s Image API, assigning it to the generated Page, based on the given Search Parameters
- Pexels: Assign an image from Pexels to the generated Page, based on the given Search Parameters
- Pixabay: Assign an image from Pexels to the generated Page, based on the given Search Parameters
- Wikipedia: Assign an image from Wikipedia to the generated Page, based on the given Search Parameters
Search Parameters: Creative Commons
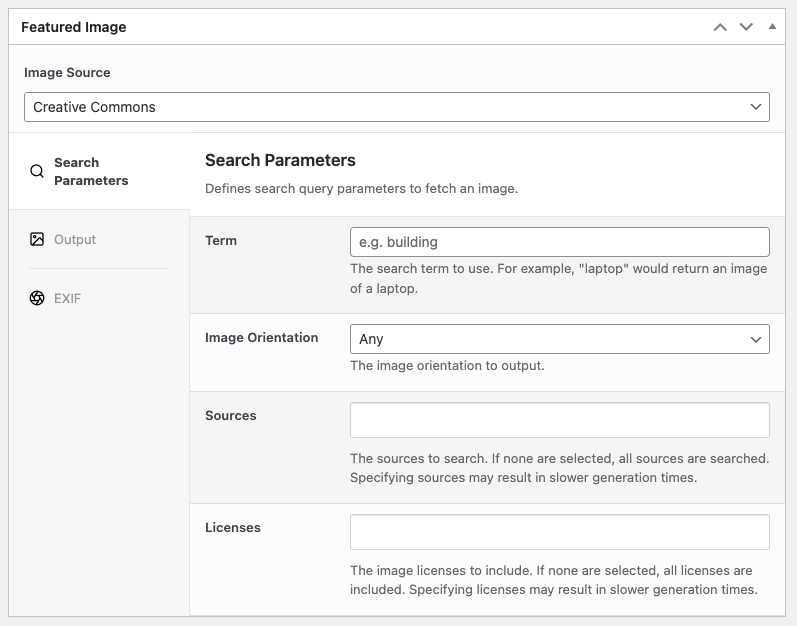
When the Image Source is set to Creative Commons, the following options are displayed in the Search Parameters tab to determine the image to use from Creative Commons:
- Term: Fetch an image at random from Creative Commons matching the given Term.
- Keywords can be used.
- Image Orientation: The image orientation to search for
- Sources: The images source(s) to search.
- If no value is specified, images from all sources will be included.
- Licenses: The image licenses to include.
- If none are selected, all licenses are included.
Search Parameters: Featured Image from URL (FIFU)
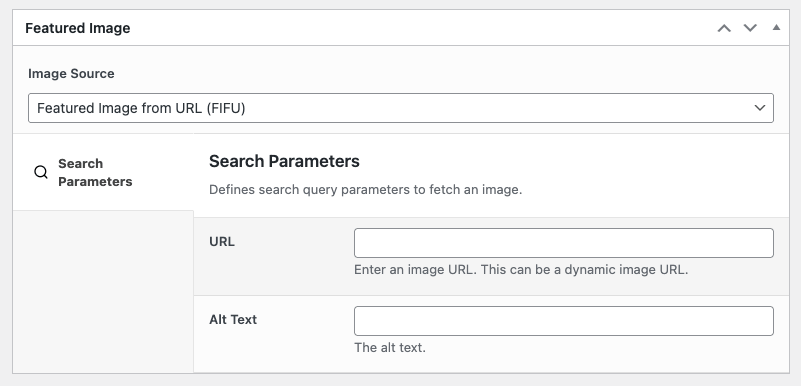
When the Image Source is set to Featured Image from URL (FIFU), the following options are displayed in the Search Parameters tab to determine the image to use for the Featured Image from URL (FIFU) Plugin:
- URL: The image URL to use for the Featured Image.
- Keywords can be used.
- Alt Text: The alt text to output for the URL.
Search Parameters Gemini AI
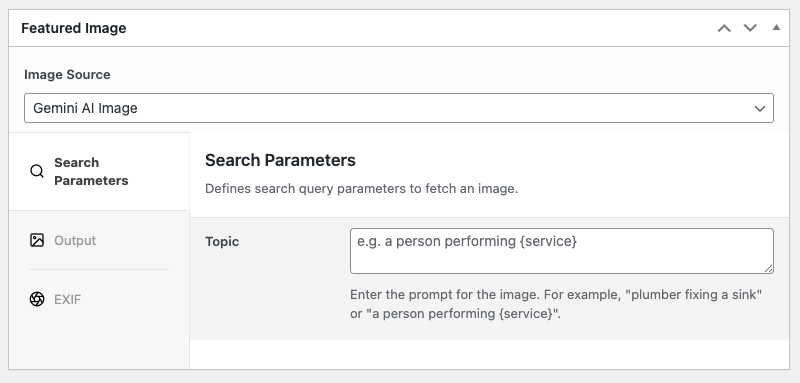
When the Image Source is set to Gemini AI Image, the following options are displayed in the Search Parameters tab to determine the image to use:
- Topic: The prompt for the image. For example, “a black bmw 4 series on a winding country road in the united kingdom”.
- Keywords can be used.
Search Parameters: Ideogram AI Image
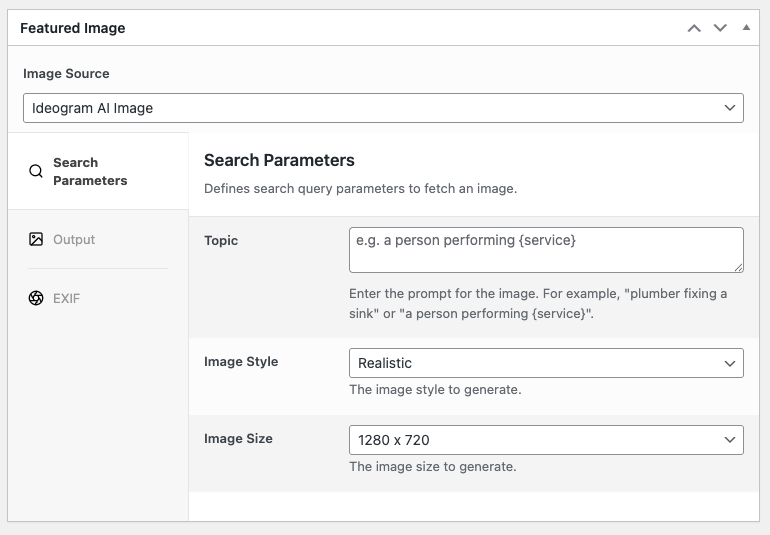
When the Image Source is set to Ideogram AI Image, the following options are displayed in the Search Parameters tab to determine the image to use:
- Topic: The prompt for the image. For example, “a plumber fixing a kitchen sink tap that is leaking in an American style 2000’s home”.
- Keywords can be used.
- Image Style: The image style to generate.
- Image Size: The image size to generate.
Search Parameters: Image URL
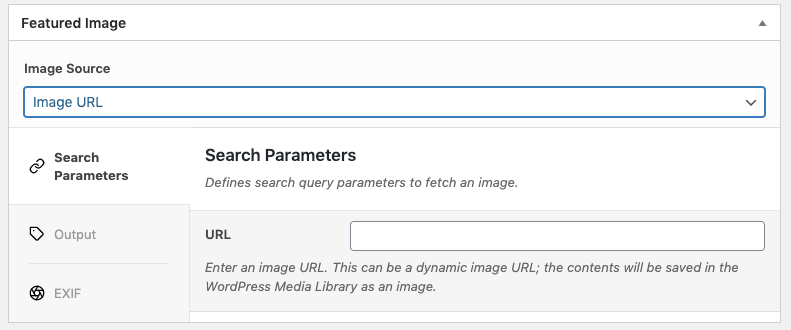
When the Image Source is set to Image URL, the following options are displayed in the Search Parameters tab to determine the image to use:
- URL: Define the image URL to use. This can be a dynamic image URL; the contents will be saved in the WordPress Media Library as an image.
Search Parameters: Media Library Image
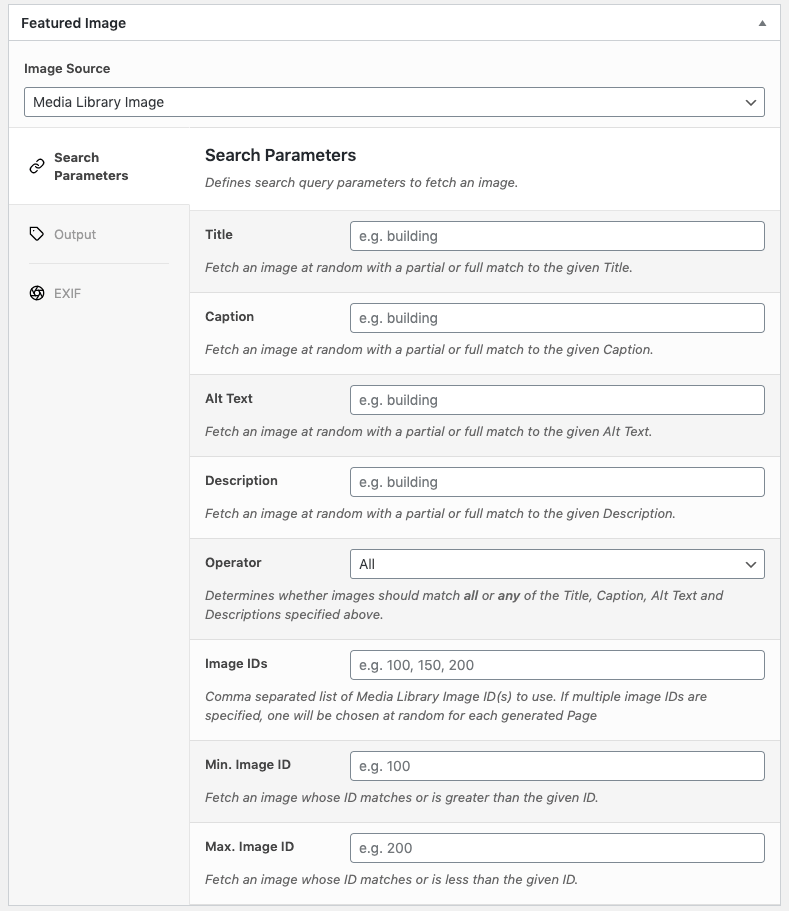
When the Image Source is set to Media Library Image, the following options are displayed in the Search Parameters tab to determine the image to use from the Media Library:
- Title: Fetch an image at random from the WordPress Media Library where that image’s Title has a partial or full match to the given Title.
- Caption: Fetch an image at random from the WordPress Media Library where that image’s Caption has a partial or full match to the given Caption.
- Alt Text: Fetch an image at random from the WordPress Media Library where that image’s Alt Text has a partial or full match to the given Alt Text.
- Description: Fetch an image at random from the WordPress Media Library where that image’s Description has a partial or full match to the given Description.
- Operator: Determines whether images should match all or any of the Title, Caption, Alt Text and Descriptions specified above.
- Image IDs: Define a comma separated list of Image ID(s) to use as the Featured Image. Where multiple IDs are specified, one will be chosen at random for each generated Page / Post.
- Min. Image ID: Define the minimum Image ID to use as the Featured Image. All WordPress Media Library Images with an ID equal to or greater to this value will be included when the Plugin chooses an image at random for each generated Page / Post.
- Max. Image ID: Define the maximum Image ID to use as the Featured Image. All WordPress Media Library Images with an ID equal to or less to this value will be included when the Plugin chooses an image at random for each generated Page / Post.
Where multiple parameters are specified, they are used in conjunction with one another. This can be useful if you have a Media Library comprising of thousands of images, and you want to balance fetching an image at random with fetching an image that has some relevance to the content.
For example, if your Media Library contains 10 images with the title plumbing, and we set the Title field above to plumbing, Page Generator Pro would:
- Find all images in your WordPress Media Library containing the word plumbing in the Title,
- For each Page / Post that Page Generator Pro generates, the Plugin will chose one of those images at random to be used as the Featured Image.
Search Parameters: Midjourney
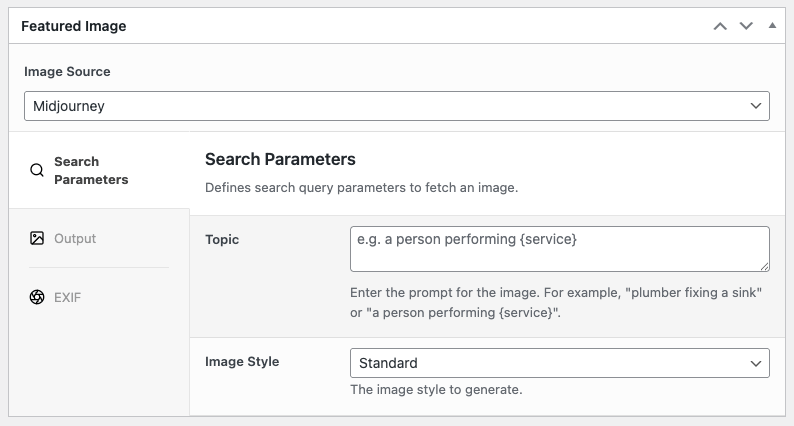
When the Image Source is set to Midjourney, the following options are displayed in the Search Parameters tab to determine the image to use from Pexels:
- Topic: The prompt for the image. For example, “a plumber fixing a kitchen sink tap that is leaking in an American style 2000’s home”.
- Keywords can be used.
- Image Style: The style of image to generate.
- Standard
- Raw
Search Parameters: OpenAI Image
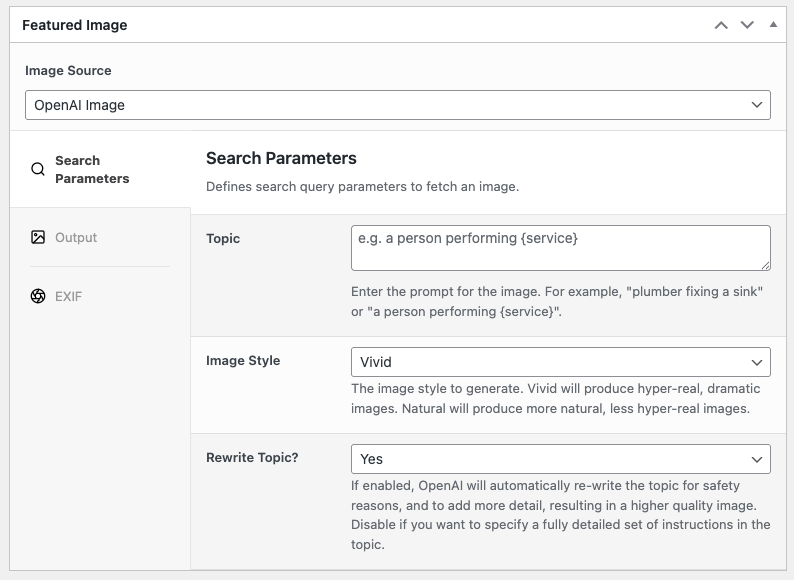
When the Image Source is set to OpenAI Image, the following options are displayed in the Search Parameters tab to determine the image to use from OpenAI:
- Topic: The prompt for the image. For example, “a plumber fixing a kitchen sink tap that is leaking in an American style 2000’s home”.
- Keywords can be used.
- Image Style: The style of image to generate. This option is displayed when the OpenAI Image model is set to Dall-E 3.
- Vivid: Generate a hyper-real, dramatic image.
- Natural: Generate a more natural, less hyper-real image.
- Background: Whether to include a background in the image. This option is displayed when the OpenAI Image model is set to
gpt-image-1.- Auto
- Transparent
- Opaque
Search Parameters: Pexels
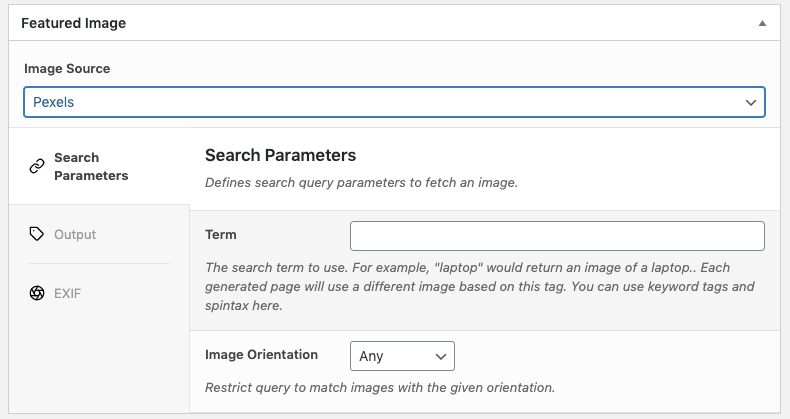
When the Image Source is set to Pexels, the following options are displayed in the Search Parameters tab to determine the image to use from Pexels:
- Term: The search term to use. For example, “laptop” would return an image of a laptop.. Each generated page will use a different image based on this tag. You can use keyword tags and spintax here.
- Image Orientation: Restrict query to match images with the given orientation.
Search Parameters: Pixabay
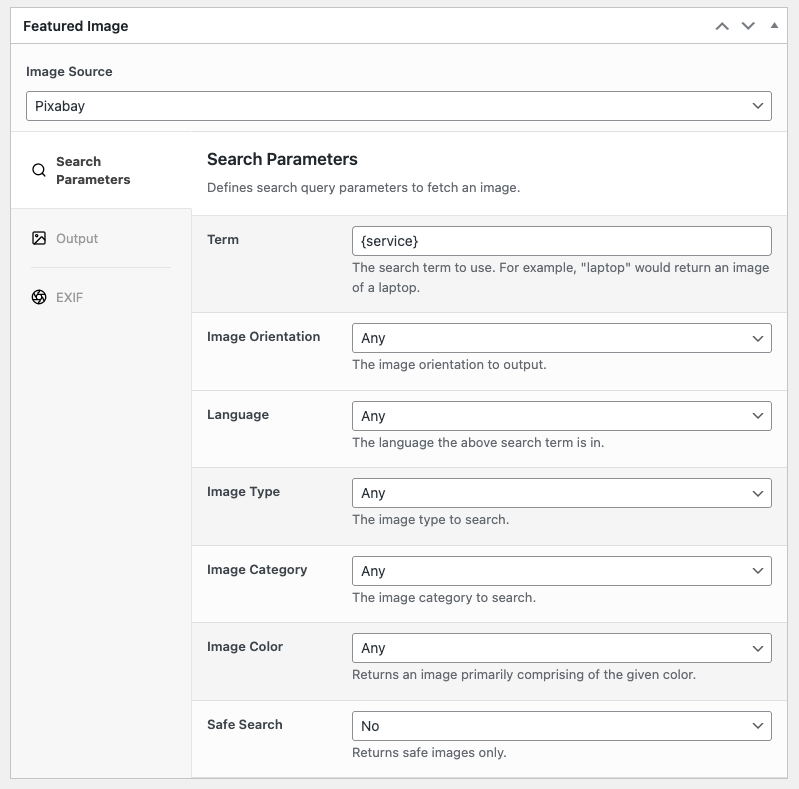
When the Image Source is set to Pixabay, the following options are displayed in the Search Parameters tab to determine the image to use from Pixabay:
- Term: The search term to use. For example, “laptop” would return an image of a laptop.. Each geneated page will use a different image based on this tag. You can use keyword tags and spintax here.
- Image Orientation: The image orientation to search for
- Language: The language the search term is in
- Image Type: The type of image to search for (illustration, vector or photo)
- Image Category: For more precise matching, optionally choose an image category to search within
- Image Color: Optionally limit results by the given primary image color
- Safe Search: Returns safe images only
Search Parameters: Wikipedia Image
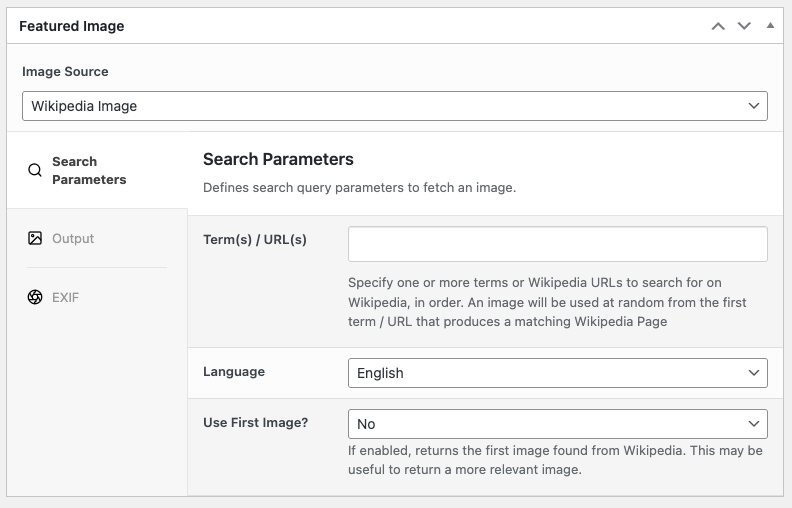
When the Image Source is set to Wikipedia Image, the following options are displayed in the Search Parameters tab to determine the image to use from Wikipedia:
Term(s) / URL(s)
Specify one or more Terms or exact Wikipedia URLs to search Wikipedia.
Keywords are supported in the Term(s) field.
Where multiple Terms / URLs are specified, searching is performed in the order specified. Once a matching article is found for a Term / URL, searching stops. Therefore, it’s recommended that you specify the most exact Term / URL first, through to the least exact Term last (which acts as a fallback should no content be found for more precise Terms).
Specifying multiple Terms does not mean that images are collated from multiple articles.
To add a Term:
- Start typing in the Term(s) field
- Either click the ‘Add’ option which appears below the field, or press the Enter key
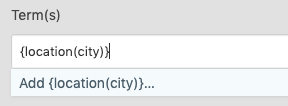
- Repeat for any additional Term(s) that you may wish to search for on Wikipedia
To re-order Terms (which determines the search order):
- Drag and drop a Term to the left or right as necessary
To delete a Term, either:
- Use the keyboard arrow keys within the field to move the caret to the right of a Term, and press the backspace key to delete it, or
- Click the cross icon to the right of an existing Term.
Language
The language to use when searching Wikipedia for images.
Use First Image
If enabled, uses the first image found when searching Wikipedia. This will typically provide an image that is more relevant to the Term.
If disabled, uses an image at random from all images found when searching Wikipedia for the given Term.
Output
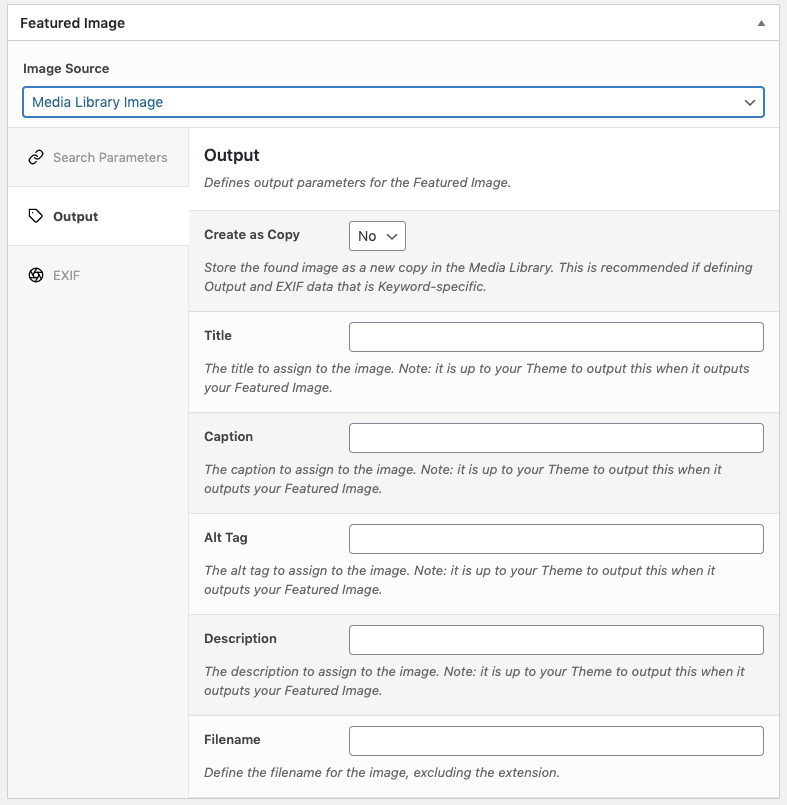
Clicking the Output tab in the Featured Image meta box displays the following options:
- Create as Copy
- This option is displayed if Image Source = Media Library Image
- It’s recommended to enable this, to ensure that a new Media Library Image is created and its metadata set specific to the generated page for SEO
- Title: The title to assign to the image. Note: it is up to your Theme to output this when it outputs your Featured Image.
- This can be a keyword.
- Alt Tag: The alt tag to assign to the image. Note: it is up to your Theme to output this when it outputs your Featured Image.
- This can be a keyword.
- Caption: The caption to assign to the image. Note: it is up to your Theme to output this when it outputs your Featured Image.
- This can be a keyword.
- Description: The description to assign to the image. Note: it is up to your Theme to output this when it outputs your Featured Image.
- This can be a keyword.
- Filename: Define the filename for the image, excluding the extension.
- This can be a keyword.
- It’s useful to use a keyword and/or other terms to ensure that the filename is SEO friendly and related to your content.
EXIF
EXIF metadata is supported for JPEG images.
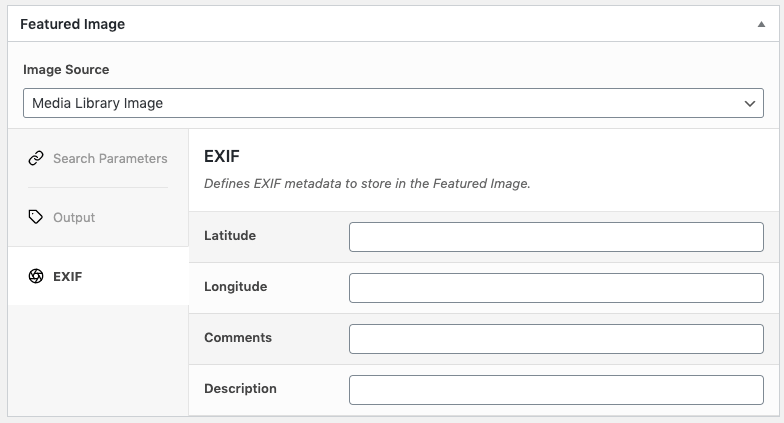
Clicking the EXIF tab in the Featured Image meta box displays the following options:
- Latitude: The image’s location’s latitude.
- Longitude: The image’s locations’ longitude.
- Comments: Comments about the image.
- Description: A description of the image.
If any value is blank and the imported image contains an existing value in the EXIF metadata, the existing value will be retained.
Any other EXIF metadata already stored within an image is retained (for example, but not limited to, the color profile, camera make/model etc).
Featured Image from URL
If the Featured Image from URL Plugin is installed and active, you can choose it as the Featured Image Source and define the following:
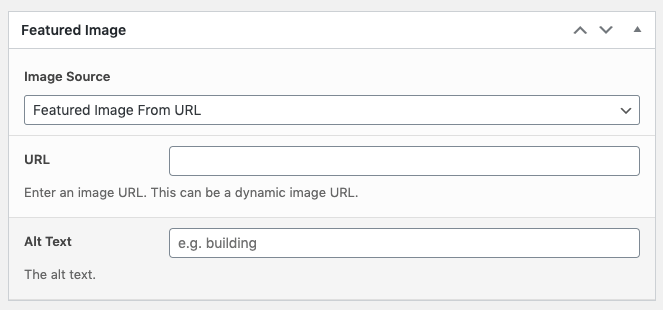
- URL: The external image URL to use as the Featured Image on each Generated Page
- Keywords are supported
- Alt Text: The alt text to use on the Featured Image on each Generated Page
- Keywords are supported
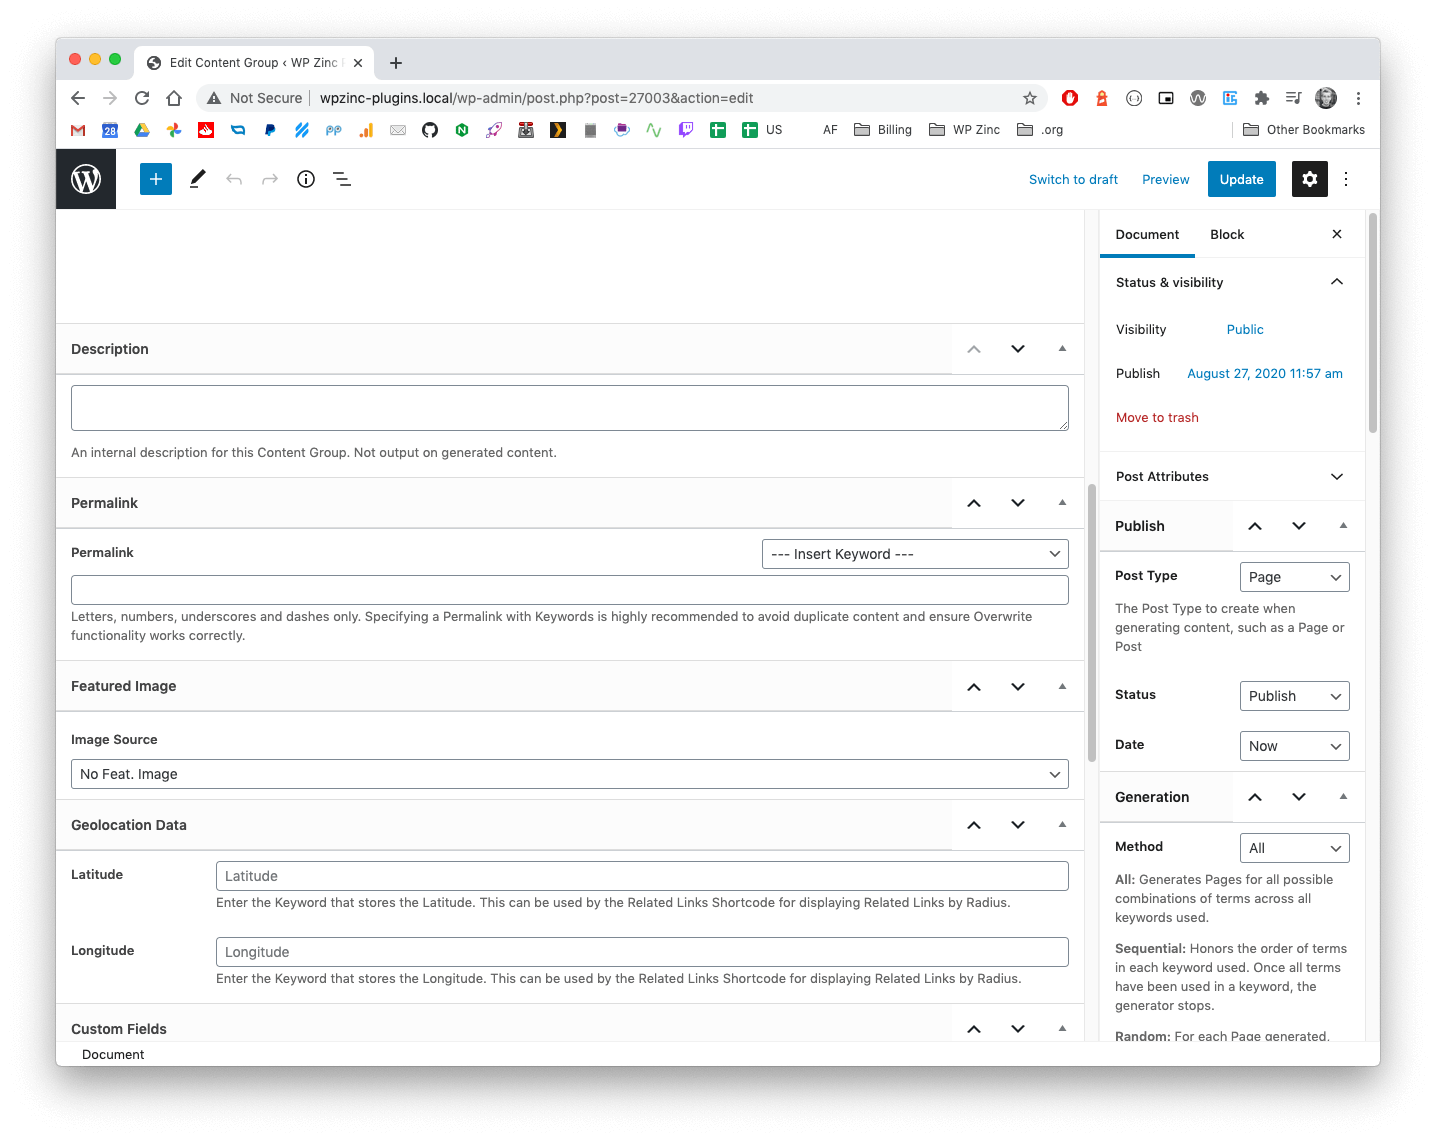
Fields: Geolocation Data
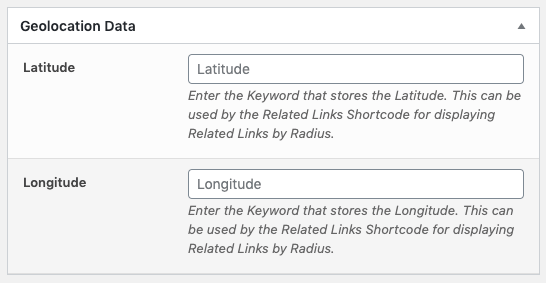
If specified, Page Generator Pro will store the Latitude and Longitude associated with each Generated Page.
For example, if you are generating location-specific Pages, and have a Keyword containing location-specific geolocation data, you can enter the Keywords here.
The option to manually exclude specific existing generated pages from being overwritten is available in Page Generator Pro 5.5.5, releasing Tuesday May 26th 2026 23:59 UTC.
To manually update the existing Latitude and Longitude on existing generated pages:
- Edit the generated Page, Post or Custom Post in WordPress
- Change the Latitude and Longitude:
- Save the Page
Fields: Custom Fields
Store Keywords?
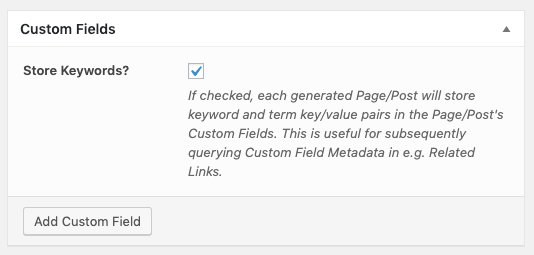
If checked, Page Generator Pro will store the keyword names (including subsets, if defined) and terms used for each generated Page as Custom Fields (otherwise known as Post Meta).
For example, a Content Group containing two keywords, {service} and {location}, where {location} specifies column names of County and City, would store the following data in Custom Fields on the generated Page:
| Keyword | Term Used | Custom Field Key | Custom Field Value |
|---|---|---|---|
| {location} | Birmingham, West Midlands | location | Birmingham, West Midlands |
| {location(city)} | Birmingham | location_city | Birmingham |
| {location(county)} | West Midlands | location_county | West Midlands |
| {service} | Web Design | service | Web Design |
This is useful should you use the Related Links shortcode and wish to fetch a list of Pages by a specific Custom Field value (for example, where a location matches a specific County).
Defining Custom Fields
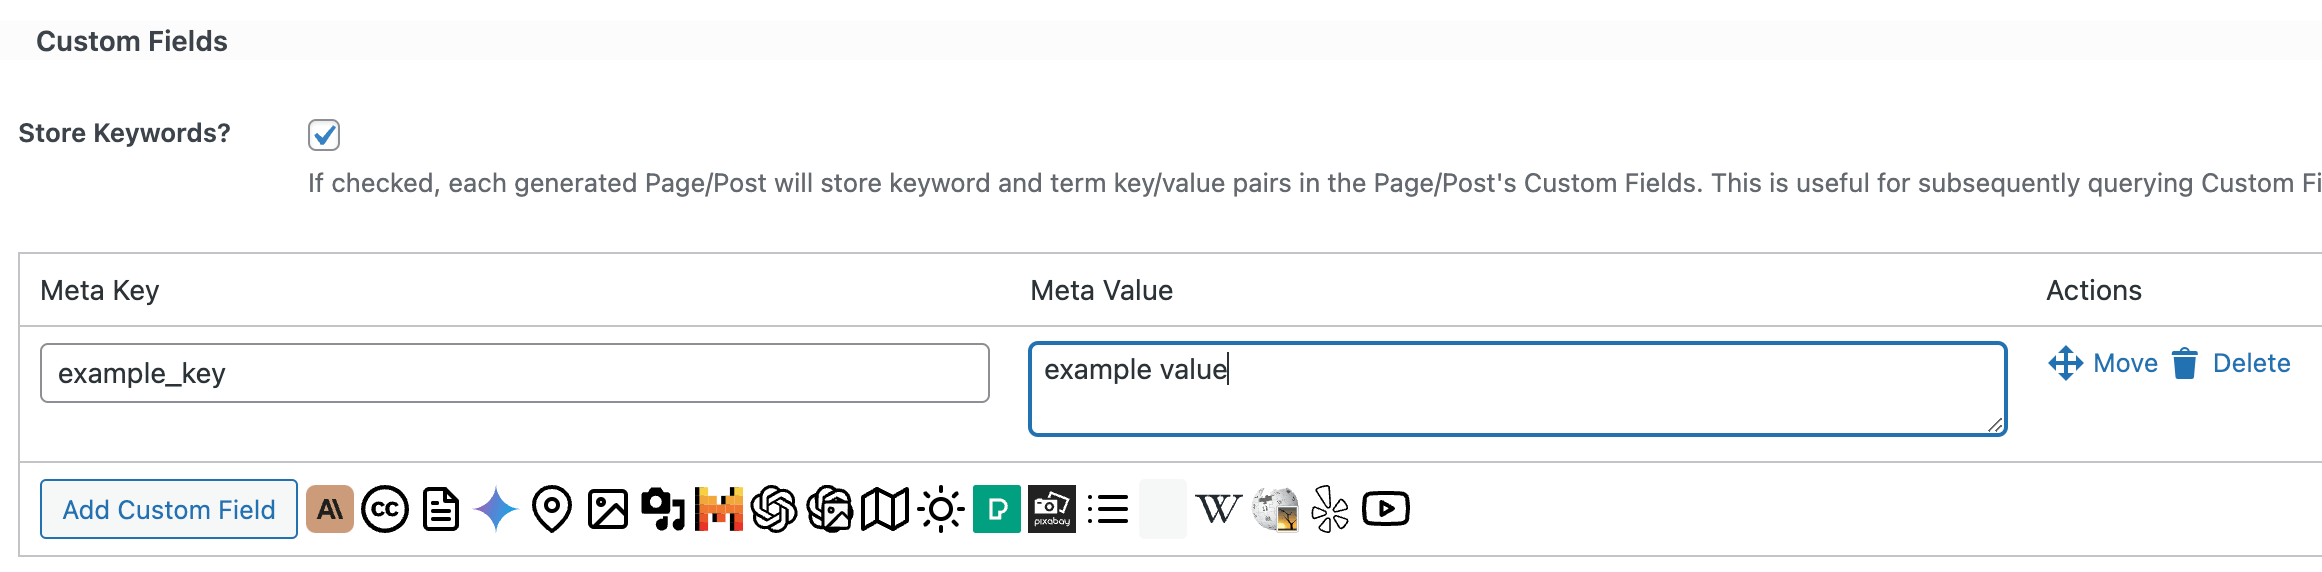
You can add, edit or delete custom fields (Post Meta fields) to each generated Page:
- To add a Custom Field, click the Add Custom Field button, and then define the Meta Key and Meta Value.
- To edit an existing Custom Field, change the Meta Key and/or Meta Value to suit.
- To delete an existing Custom Field, click the delete link below the Meta Key field.
Dynamic Elements
You can add Dynamic Elements as custom fields (Post Meta fields) for each generated Page, by:
- Clicking the button for the applicable Dynamic Element,

- Entering the applicable configuration in the modal window,
- Clicking Insert
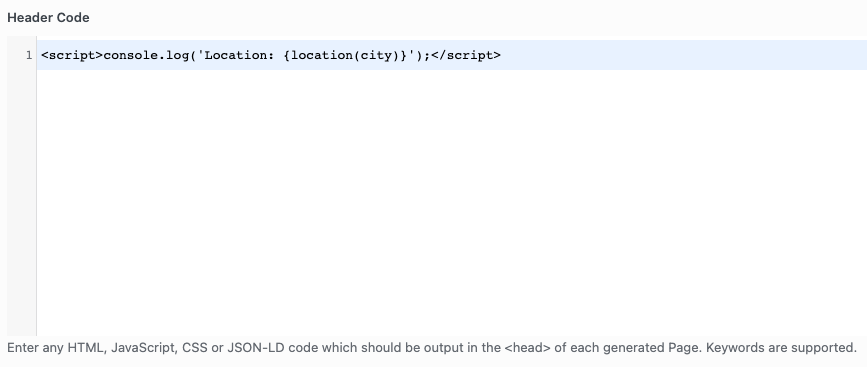
Fields: Header & Footer Code

You can optionally specify any JavaScript, CSS or JSON-LD to output in each generated Page’s <head> section, by entering code in the Header Code field:
You can optionally specify any HTML, JavaScript, CSS, JSON-LD or Shortcodes to output immediately before each generated Page’s closing </body> tag, by entering code in the Footer Code field:
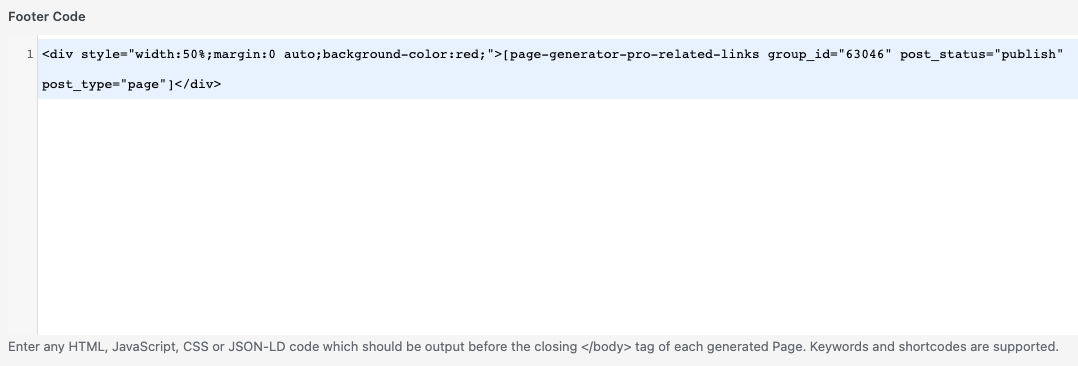
Keywords are supported for both fields, and will be replaced by their Terms on generation.
Fields: Author
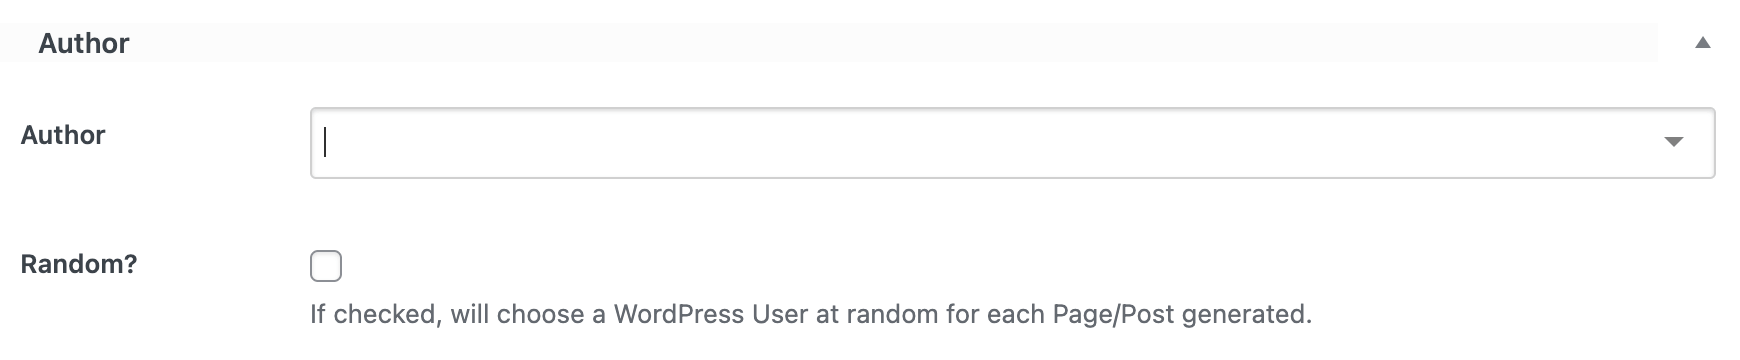
You can specify the Author of the generated content, or have Page Generator Pro randomly choose a WordPress User at random for each Page/Post generated.
- Author: Specify the Author of the generated content. Ignored if the Rotate option below is checked.
- The dropdown list will not be pre-populated with all WordPress Users. This is for performance where sites having a large number of WordPress Users would result in timeout issues.
- Therefore, to specify an author, begin typing at least 2 – 3 characters of the Author’s WordPress Username, and then choose the applicable Author from the results list.

- Rotate: If checked, this option will choose a different Author for each Post that is generated. If not checked, an additional option will appear, allowing you choose which Author should be assigned to the Post.
Fields: Discussion

- Allow comments: Choose to allow comments to be added to each generated Post.
- Allow trackbacks and pingbacks: Choose to allow trackbacks and pingbacks to be added to each generated Post.
Fields: Discussion: Generate Comments
When enabled, comments will be generated for each generated Page/Post. This functionality is controlled by the additional options that are displayed when the Generate Comments? option is enabled/ticked:
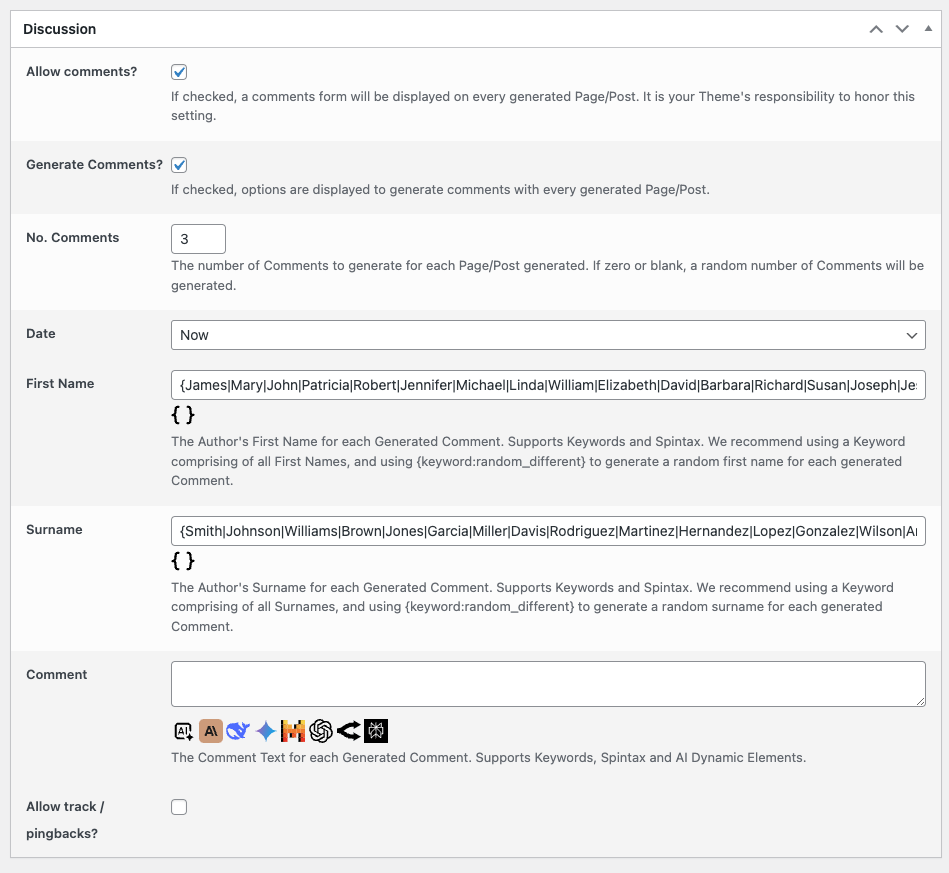
- No. Comments: The number of Comments to generate for each generated Page/Post. If zero, a random number of Comments for each generated Page/Post will be produced, which is recommended.
- Date: Defines the published date of each generated Comment:
- Now: The date and time each generated Comment is generated
- Specific Date: Defines the published date of each generated Comment to match the specified date
- Random Date: Define the published date of each generated Comment to match a date and time at random between the specified start and end dates
- First Name: The Comment Author’s First Name for each generated Comment.
- Keywords and Spintax are supported
- We recommend using a Keyword comprising of all First Names (for example, called authors_first_name), and using the Output Different Random Term modifier with this Keyword (for example, {authors_first_name:random_different}). This will generate a random first name for each generated Comment.
- Alternatively, click the spintax button below the First Name field to automatically populate it with spintax of 100 common first names.
- Surname: The Comment Author’s Surname for each generated Comment.
- Keywords and Spintax are supported
- We recommend using a Keyword comprising of all Surnames (for example, called authors_surname), and using the Output Different Random Term modifier with this Keyword (for example, {authors_surname:random_different}). This will generate a random surname for each generated Comment.
- Alternatively, click the spintax button below the Surname field to automatically populate it with spintax of 100 common surnames.
- Comment: The Comment Text for each generated Comment.
- Keywords, Spintax and AI Dynamic Elements are supported
- We recommend using either:
- An AI Dynamic Element with its Content Type = Review (Plain Text, no schema),
- Spintax (with either Block Spintax and/or Nested Spintax.
- This will allow for a wide range of random variations to be produced for each comment’s text.
Keywords will be cycled through based on the comment’s index, not the generated Page/Post’s index. If you wish to ‘lock’ or reference the Keyword Term used in the generated Page/Post, use the :current modifier. See Documentation.
For a more in depth walkthrough, see the Generating Comments Tutorial.
Fields: Publish
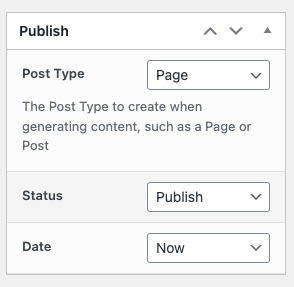
- Post Type: Choose the Post Type to generate. This might be Pages, Posts or any registered Custom Post Types provided by your themes or plugins.
- Status: Choose the status of each generated Page
- Draft: Saves each generated Page as a draft. You’ll then need to go to each Page and manually publish them if you want visitors to see them.
- Scheduled: Schedules publication of each generated Page, based on the Date setting below, with the Schedule Increment applied (if defined).
- All Pages are generated at the point of generation, with their scheduled dates set. This is deliberate and by design.
- Private: Saves each generated Page as private.
- Published: Publishes each generated Page, based on the Date setting below.
- Date: Defines the published date of generated Pages:
- Now: The date and time each generated Page is generated
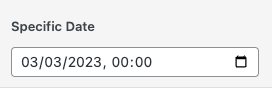
- Specific Date: Defines the published date of generated Pages to match the specified date
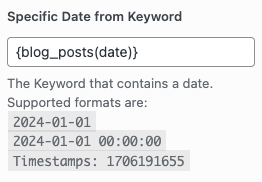
- Specific Date from Keyword: Defines the published date of generated Pages to match the specified date that is stored in a Keyword
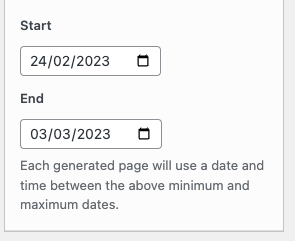
- Random Date: Define a date and time at random between the specified start and end dates.
- Schedule Increment: When Status = Scheduled and Date = Now or Specify Date, the Schedule Increment option appears, allowing you to define the scheduled publication date and time relative to the last generated Page’s scheduled date and time, in minutes, hours, days, weeks or months
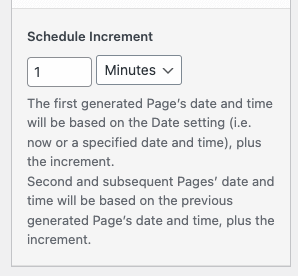
- The first generated Page’s scheduled publication date and time will be based on the Date setting (i.e. now or a specified date and time), plus the increment (as there is no previous generated Page to increment a date/time from).
- Second and subsequent Pages’ scheduled publication date and time will be based on the previous generated Page’s date and time, plus the increment.
Fields: Generation
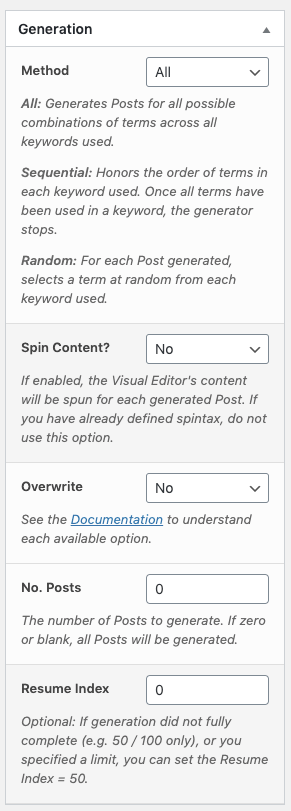
In conjunction with the Method option, there are other generation settings:
Fields: Generation: Spin Content
To create spintax from text, use the Generate Spintax from Selected Text functionality.
Fields: Generation: Overwrite
When generating content, Page Generator Pro will attempt to see if an existing Page matching the Permalink already exists. If so, the option set here determines whether that existing Page should be overwritten, not overwritten or skipped.
| Setting | Description |
|---|---|
| No |
|
| No, skip if existing Page generated by this Group |
|
| No, skip if existing Page exists |
|
| Yes, if existing Page generated by this Group |
|
| Yes, if existing Page exists |
|
Fields: Generation: Overwrite Sections
When the Overwrite setting above is set to a Yes option, an additional option is then displayed to define which sections to overwrite if generation would overwrite an existing Page, Post or Custom Post Type: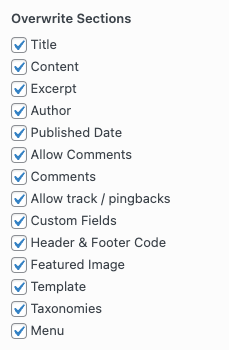
For example, if you have manually edited content on existing generated Pages and do not want to overwrite those changes, you would deselect the Content option. The Plugin will, on generation, overwrite the existing generated Page’s other sections (Title, Excerpt etc), but retain the Content on the existing generated Pages.
If the Overwrite setting above is set to a Yes option and the Plugin detects that a new Page would be created (for example, new Keyword Terms have been added since the previous generation), all sections of the new generated Page/Post/Custom Post Type will be populated – regardless of the sections specified above. This is deliberate and by design, to ensure that new Pages do not have blank sections.
Fields: Generation: Overwrite Sections: Third Party Plugins
In addition to the Overwrite Sections above, further sections may be displayed depending on any third party Plugins that might be activated: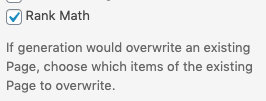
This includes:
- All in One SEO Pack
- Advanced Custom Fields
- Genesis Framework
- ListingPro
- Meta Box (Metabox.io)
- Platinum SEO
- Popup Maker
- Rank Math SEO
- Schema Pro
- SEOPress
- SEOPressor
- SmartCrawl SEO
- Squirrly SEO
- The SEO Framework
- WooCommerce Products
- WPSSO
- WPTouch Pro
- Yoast SEO
- Yoast SEO Pro
For example, if you have Yoast SEO installed and active, have manually edited Yoast SEO’s metadata on existing generated Pages and do not want to overwrite those changes, you would deselect the Yoast SEO option. The Plugin will, on generation, overwrite the existing generated Page’s other sections (Title, Excerpt etc), but retain the Yoast SEO metadata on the existing generated Pages.
Fields: Generation: Overwrite Sections: Advanced Custom Fields
In addition to the Overwrite Sections above, further sections may be displayed if:
- Advanced Custom Fields (or Advanced Custom Fields Pro) is active, and
- At least one Field Group has been configured to display on Content Groups.
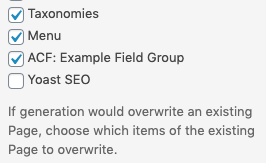
For example, if you have:
- An ACF Field Group called Example Field Group configured for both Content Groups and Pages
- Manually edited Field(s) within this Field Groupon existing generated Pages
– and you do not want to overwrite the manual changes made to the ACF Field(s), you would deselect the ACF: Example Field Group option.
The Plugin will, on generation, overwrite the existing generated Page’s other sections (Title, Excerpt etc), but retain the ACF Field metadata for the Example Field Group on the existing generated Pages.
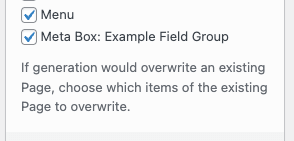
Fields: Generation: Overwrite Sections: Meta Box (Metabox.io)
Support for Meta Box (Metabox.io) is available in Page Generator Pro 5.3.1 and higher, available Monday November 3rd 2025 23:59 UTC.
In addition to the Overwrite Sections above, further sections may be displayed if:
- Meta Box (Metabox.io) is active, and
- At least one Meta Box Field Group has been configured to display on Content Groups.
You must be using one of the following Plugins for this to work:
– Meta Box: https://wordpress.org/plugins/meta-box/
– Meta Box Lite: https://metabox.io/lite/
– Meta Box AIO: https://metabox.io/aio/
For example, if you have:
- A Meta Box Custom Field Group called Example Field Group configured for both Content Groups and Pages
- Manually edited Field(s) within this Field Group on existing generated Pages
– and you do not want to overwrite the manual changes made to the Custom Field(s), you would deselect the Meta Box: Example Field Group option.
The Plugin will, on generation, overwrite the existing generated Page’s other section.
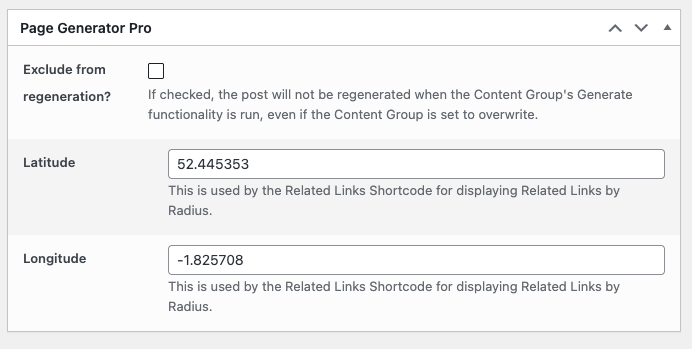
Fields: Generation: Overwrite: Manually Exclude Pages
The option to manually exclude specific existing generated pages from being overwritten is available in Page Generator Pro 5.5.5, releasing Tuesday May 26th 2026 23:59 UTC.
To manually exclude specific existing generated pages, regardless of the overwrite setting used above:
- Edit the generated Page, Post or Custom Post in WordPress
- Enable the “Exclude from regeneration” option
- Classic Editor: Use the meta box
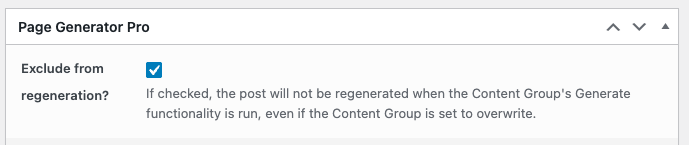
- Gutenberg / Block Editor: Click the plugin icon on the top right corner, and then toggle the option
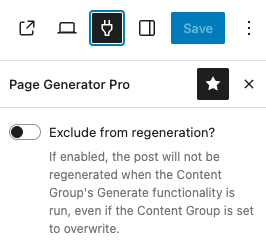
- Classic Editor: Use the meta box
- Save the Page
Fields: Generation: Number of Pages
Choose the number of Pages to generate. If zero, Page Generator Pro will attempt to produce all possible combinations based on the above generation method.
It’s useful to set this option if you have a large number of Pages and – in conjunction with the Resume Index below – want to chunk generation into smaller batches.
Fields: Generation: Resume Index
By default, Page Generator Pro starts at a zero based index for keyword terms. You can choose to start at a different index (if, for example, Page Generation did not fully complete), by setting Resume Index to restart on the nth iteration.
The Use Last Generated Index link will set the Resume Index’s value to the nth iteration that successfully generated.
Fields: Attributes
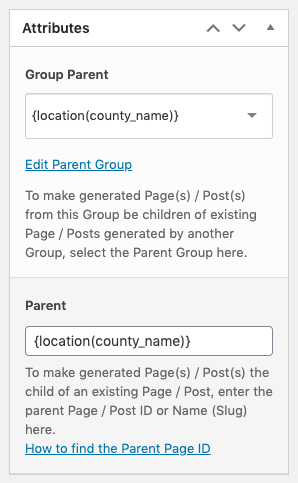
Group Parent
The Group Parent option assigns the Content Group to be an immediate child of the specified Group. This is useful if you’re building a directory structure, and wish to show this in your Content Groups table: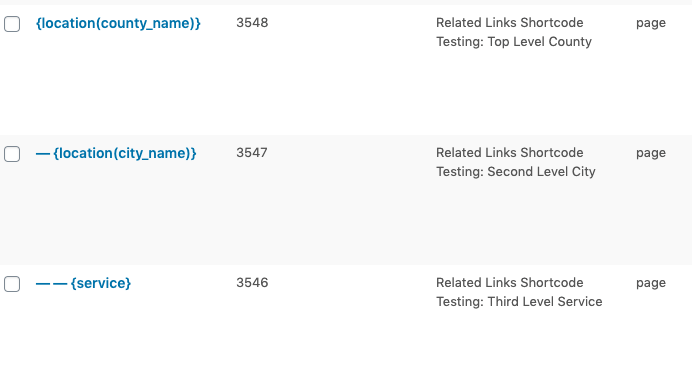
Setting the Group Parent alone is not enough; you must also define the Parent below.
When defined, Page Generator Pro will check that the Parent (specified below) was generated by the Parent Group specified here. This is again useful for directory structures produced entirely through Page Generator Pro, to ensure Generated Pages aren’t accidentally assigned to manually created Pages.
Parent
The parent option assigns all Generated Pages to be immediate children of the specified Page, Post or Custom Post Type. This is useful if you’re building a directory structure, such as:
- http://yoursite.com/county
- http://yoursite.com/county/city
- http://yoursite.com/county/city/service
The parent option can be any of the following:
- Page ID

- Page Slug e.g. web-design.
- This must be an existing Page, which can be generated by Page Generator Pro or a Page you’ve manually created.
- Generated Pages will be accessible at http://yoursite.com/web-design/your-generated-page-slug
- Keywords can be used
- Page Path e.g. web-design/birmingham.
- This must be an existing Page, which can be generated by Page Generator Pro or a Page you’ve manually created)
- Generated Pages will be accessible at http://yoursite.com/web-design/birmingham/your-generated-page-slug
- Keywords can be used
Fields: Template
Similar to editing a WordPress Page, you can specify the Page or Custom Post Type Template to use.
Fields: Menu
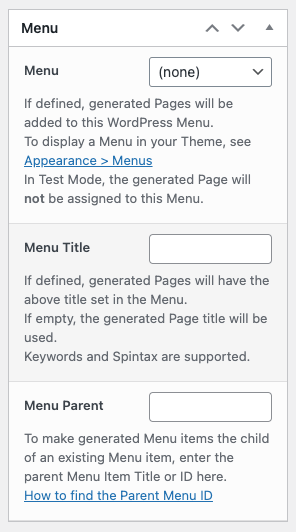
For each generated Page, Post or Custom Post Type, you can optionally add a link to it in a WordPress Navigation Menu.
This is useful if, for example:
- You use a Menu widget in WordPress, Gutenberg or a Page Builder to display a list of links,
- Your theme supports a main, secondary or perhaps footer menu and you’d like to display a list of top level pages that you’ve generated from this Content Group
Menu
- Choose an existing WordPress Navigation Menu to add generated Pages to.
- If you don’t have a Menu, or want to create one specifically for this Content Group, refer to WordPress’ Documentation for creating a new Navigation Menu
- If a generated Page already exists in the Navigation Menu, it will be updated
Menu Title
- If specified, generated Pages will use this Title in the Menu instead of the generated Page Title.
- If blank, the generated Page’s Title will be displayed in the Menu
- Keywords and Spintax are supported
Menu Parent
If specified, generated Pages will be added as children to an existing Menu Item. Keywords are supported.
The parent option can be any of the following:
- Menu Item Title
- For example, if there is an existing Menu Item in the Navigation Menu called “Web Design”, entering Web Design in this field would result in all generated Pages being added as children / sub menu items of the Web Design Menu item.
- Menu Item ID
- For example, if there is an existing Menu Item in the Navigation Menu with an ID of 76346, entering 76346 in this field would result in all generated Pages being added as children / sub menu items of said Menu Item.
- An existing Menu Item’s ID can be found by:
- Navigating to Appearance > Menus in the WordPress Administration
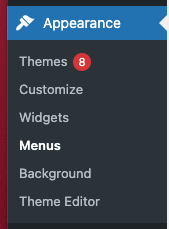
- Find the Menu Item that will be the parent

- Hover the mouse cursor over the Remove or Cancel links

- Make a note of the menu-item ID

- Navigating to Appearance > Menus in the WordPress Administration
- This is useful if the Menu Parent’s title is not plain text (such as an emoji or HTML). In these scenarios, a Menu ID must be specified for correct working functionality.
Fields: Taxonomies
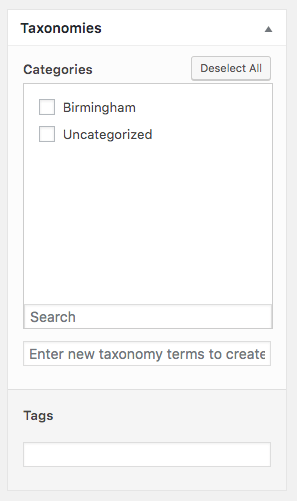
For each Taxonomy for the Post Type, you can choose which Term(s) to assign to the generated Posts.
- Hierarchical (e.g. Categories)
- Use the checkboxes to select the existing Terms to assign to the generated content.
- Use the Enter new taxonomy terms field to enter a comma separated list of new and/or existing Terms to assign to the generated content.
- Terms can comprise of one or more Keywords.
- Any Terms specified that do not exist will be created.
- Any existing Terms specified that do exist will be used.
- Non-Hierarchical (e.g. Tags)
- Enter a comma separated list of Terms to assign to the generated content.
- Keywords can be used here
- Any tags added that do not exist will be created
Fields: Other
Depending on your Theme, Page Builder and other active Plugins, you may see additional sections and fields that you can complete.
Where displayed, these fields’ data will be copied into the generated Pages, Posts or Custom Post Types.
Save
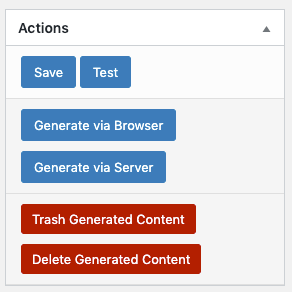
Once you have completed all fields either:
- Classic Editor: Click the Save button in the Actions meta box
- Gutenberg: Click the blue Publish button in the top right corner of the screen, clicking it a second time if a confirmation message is displayed:

- If saving an existing Content Group, this will display as Update
- Do not use the Save Draft option
Next Steps
Before testing or generating content, we strongly recommend reading the rest of the Generate Documentation, covering:
These are all useful to help generate truly valuable, unique content.