Status Settings define the status(es) to automatically send to your social media account(s) linked with your Buffer account, depending on the Post Action being performed on a Post, Page or Custom Post Type (for example, whether a Post is first published, or an existing published Page is updated).
For each Post Type, WordPress to Buffer Pro provides options to:
- Define Default status messages, depending on the Post Action being performed on the Post.
- Choose which Social Media account(s) to send content to
- Optionally define social media account specific status messages, which override the Default status messages
To set your status messages, in the WordPress Administration, click on the WP to Buffer Pro > Settings in the menu.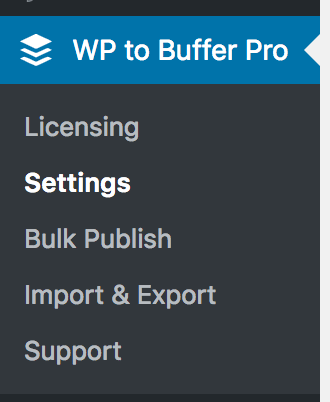
WordPress to Buffer provides a three level granular control of status(es):
Post Type
Depending on your theme and plugins, additional tabs may appear as well as the default Posts and Pages tabs. These additional tabs will be registered Custom Post Types.
To edit the status updates to be sent to Buffer for a given Post Type, click the relevant tab.
Profile
For each Post Type, you’ll see each of your Buffer social media profiles, as well as a Defaults tab, listed on the left of the screen.
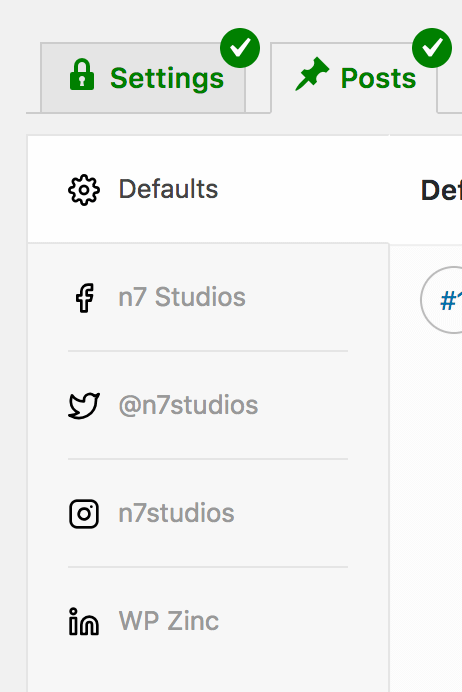
- Defaults: Global settings that apply to enabled social media accounts.
- Social Media Accounts: Each social media account linked to your Buffer account will be displayed here, one account per tab. Clicking a tab will provide options to enable posting to said social media account, as well as an option to override the default Defaults tab above.
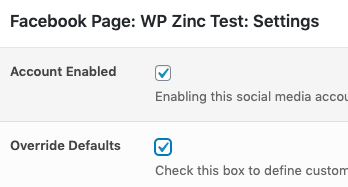
- Account Enabled: Tick this checkbox if you want to send status updates to this social media profile.
- Override Defaults: Tick this checkbox if you want to specify a custom set of status updates for this specific social media profile. If this checkbox is not ticked, the settings on the Defaults tab will be used.
Post Action
When clicking on either the Defaults tab, or a Social Media Profile, status settings are split into four Post Actions:
| Post Action | Description |
|---|---|
| Publish | Statuses defined here will be sent to Buffer for scheduled posting to the chosen social networks, when a new WordPress Post is published. |
| Update | Statuses defined here will be sent to Buffer for scheduled posting to the chosen social networks, when an existing published WordPress Post is updated. |
| Repost | Statuses defined here will be sent to Buffer for scheduled posting to the chosen social networks, when an existing WordPress Post meets the criteria for reposting. |
| Bulk Publish | Statuses defined here will be sent to Buffer for scheduled posting to the chosen social networks, when an existing WordPress Post is manually chosen by the user through the Bulk Publish screen. |
To define the status(es) to send to Buffer for a particular action, click that action tab:
Post Action: Publish

- Enabled: Tick this checkbox if you want to send a status update to your Buffer account when a Post, Page or Custom Post Type is published. This also applies to scheduled Posts, Pages and Custom Post Types.
Post Action: Update
The Update Post Action is triggered when an existing published Post is updated (that is, a WordPress User modifies the Post by clicking Update).
Any status(es) defined within the Update tab of either your Defaults, or a specific Social Media Profile, will be used when an existing published Post is updated.
Settings in the Update panel are the same as the Publish section above.
Post Action: Repost
The Repost Post Action is triggered when an existing published Post, that has not been updated for a while, is selected by the Plugin for automatic re-sending to Buffer.
Any status(es) defined within the Repost tab of either your Defaults, or a specific Social Media Profile, will be used .
Settings in the Repost panel are the same as the Publish section above.
Refer to the Repost Documentation to understand how reposting works, and where to define the conditions that determine which published Post(s) should be automatically re-posted to Buffer.
Post Action: Bulk Publish
Any status(es) defined within the Bulk Publish tab of either your Defaults, or a specific Social Media Profile, will be used when you manually use the Plugin’s Bulk Publish functionality.
Settings in the Bulk Publish panel are the same as the Publish section above.
Refer to the Bulk Publish Documentation to understand how to manually Bulk Publish Posts to Buffer.
Add Status
To add a status to a given action and/or profile:
- Navigate to the Post Type

- Click on the Profile (or, to specify status(es) that you might use across multiple Profiles, click the Defaults tab)

- Click the applicable Post Action tab (Publish, Update, Repost, Bulk Publish), depending on when you want the status(es) to be sent:

- Tick the Enabled option
- Click the Add Status Update button in the table that appears:
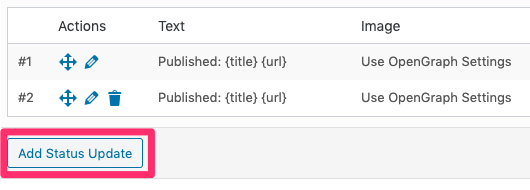
- Refer to the Status: Editing section below to configure the status.
- Click the blue Update button when you’ve finished editing a status.
Edit Status
To edit an existing status:
- Click the Edit icon (pencil) next to the status that you want to edit
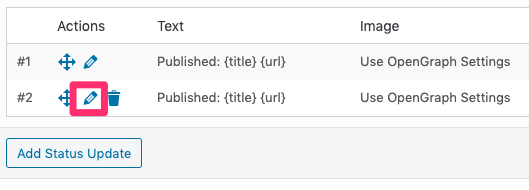
- Refer to the Status: Editing section below to configure the status.
- Click the blue Update button when you’ve finished editing a status.
Delete Status
To delete a status:
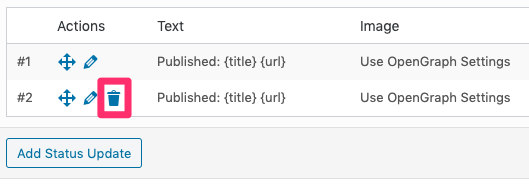
Reorder Status Updates
To re-order a status updates:
- Drag and drop them by using the move icon
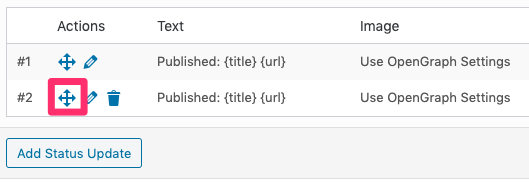
Save Statuses
You can add, edit, delete and re-order statuses for a Post Type until you’re happy with your settings.
Once done, it’s important to apply those changes by saving them.
To save changes:
- Click the blue Update button if you’re editing a status

- Click the blue Save button towards the bottom of the screen
On screen conformation will be displayed showing that the status settings have been saved.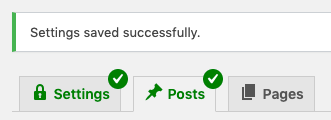
Status: Editing
When adding or editing a status update, the following form is displayed below the status: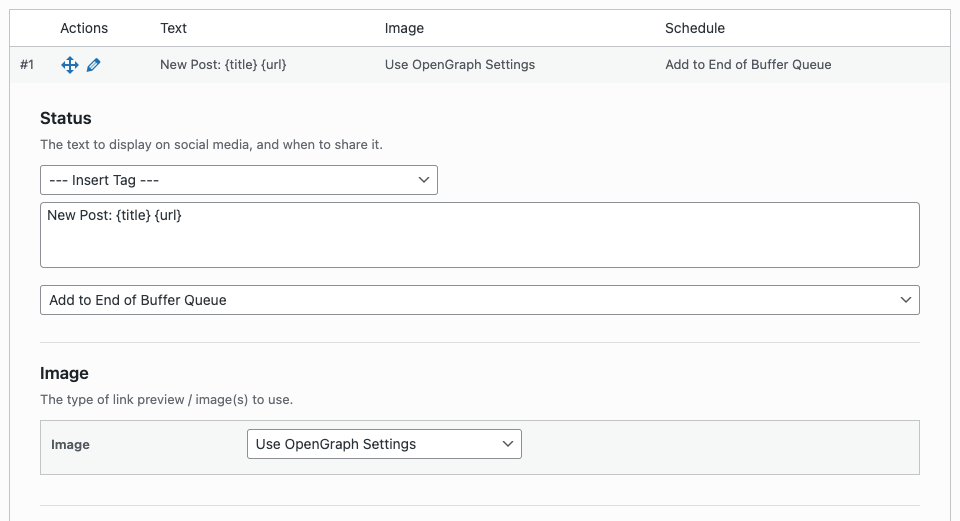
Make the applicable changes, described below, and then click the Update button when done.
Status: Text
To define the status text, edit the main textarea.
Refer to the Documentation for Post-specific Tags that can be used in this field.
Status: Scheduling

For each defined status, several options are available to define where (and when) a status should appear in your Buffer queue when the Post is published, updated, reposted or bulk published.
Add to End of Buffer Queue
Adds the status update to the end of the social media profile’s queue.
Add to Start of Buffer Queue
Adds the status update to the start of the social media profile’s queue.
Post Immediately
Posts the status update to your social media profile immediately.
Custom Time

Schedules the status update in your Buffer queue for a given offset in days, hours and minutes relative to the Post’s last updated date and time (for publishing new Posts, this will be the Post’s published date and time).
For example, to schedule the status update in your Buffer queue to be sent to your to social media profiles 2 days after your Post is published, updated, reposted or bulk published:
- Days: 2
- Hours: 0
- Minutes: 0
Custom Time (Relative Format)

Schedules the status update in your Buffer queue for a given offset relative to the Post’s last updated date and time (for publishing new Posts, this will be the Post’s published date and time).
For example, to schedule the status update in your Buffer queue to be sent the Tuesday your Post is published, updated, reposted or bulk published at 9am:
- The next: Tuesday
- at: 09:00
Custom Time (based on Custom Field / Post Meta Value)

Schedules the status update in your Buffer queue for a given offset in days, hours and minutes relative to the Post’s Custom Field / Meta Field.
For example, to schedule the status update in your Buffer queue to be sent to your social media profiles 2 days after the date given in your Post’s Custom Field called event_date:
- Days: 2
- Hours: 0
- Minutes: 0
- Before / After: After Custom Field Value
- Custom Meta Field Name: event_date
For example, to schedule the status update in your Buffer queue to be sent to your social media profiles 12 hours before the date given in your Post’s Custom Field called my_date:
- Days: 0
- Hours: 12
- Minutes: 0
- Before / After: Before Custom Field Value
- Custom Meta Field Name: my_date
Supported values for your Custom Meta Field can be found on PHP’s Documentation for Supported Date and Time Formats. These include, but are not limited to:
- yyyy-mm-dd (e.g. 2019-01-01)
- yyyy-mm-dd Hh:ii:ss (e.g. 2019-01-01 13:12:00)
- Timestamps (e.g. 1571847286)
The Events Calendar
Refer to the Documentation for applicable scheduling options when creating or editing status(es) for an Event.
Events Manager
Refer to the Documentation for applicable scheduling options when creating or editing status(es) for an Event.
Modern Events Calendar
Refer to the Documentation for applicable scheduling options when creating or editing status(es) for an Event.
Specific Date and Time

Status: Instagram Stories
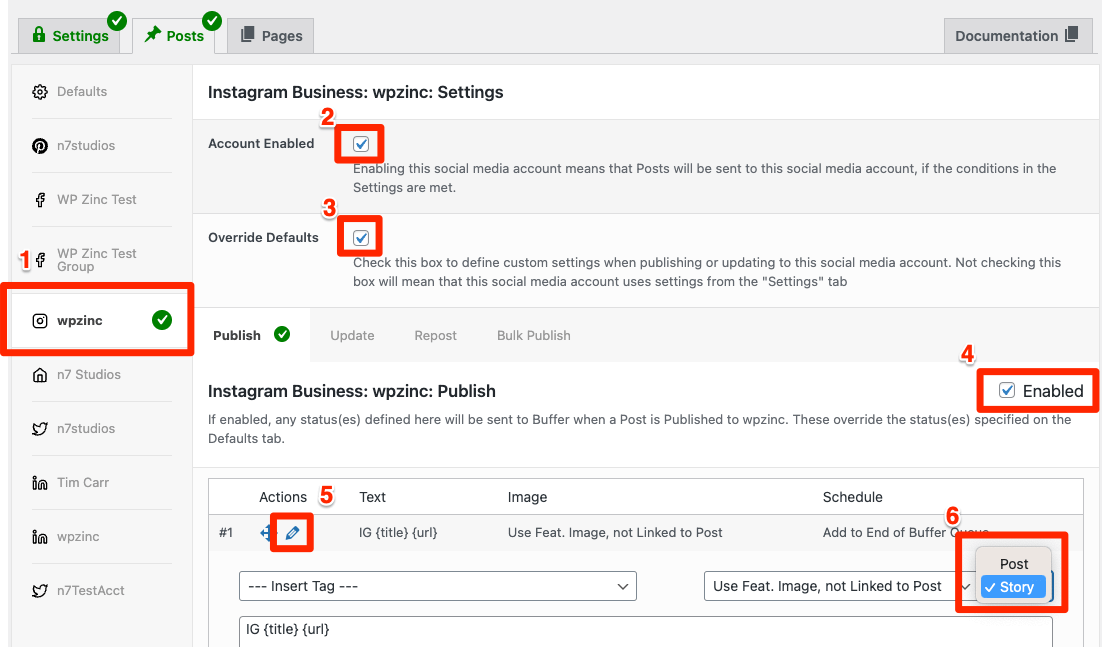
To post an Instagram story:
- Click on the applicable Instagram profile in the settings for the Post Type:
- Tick the Account Enabled option
- Tick the Override Defaults option
- Tick Enabled for the applicable action (publish, update, repost, bulk publish)
- Add / edit a status, choosing Story from the dropdown
Status: Pinterest
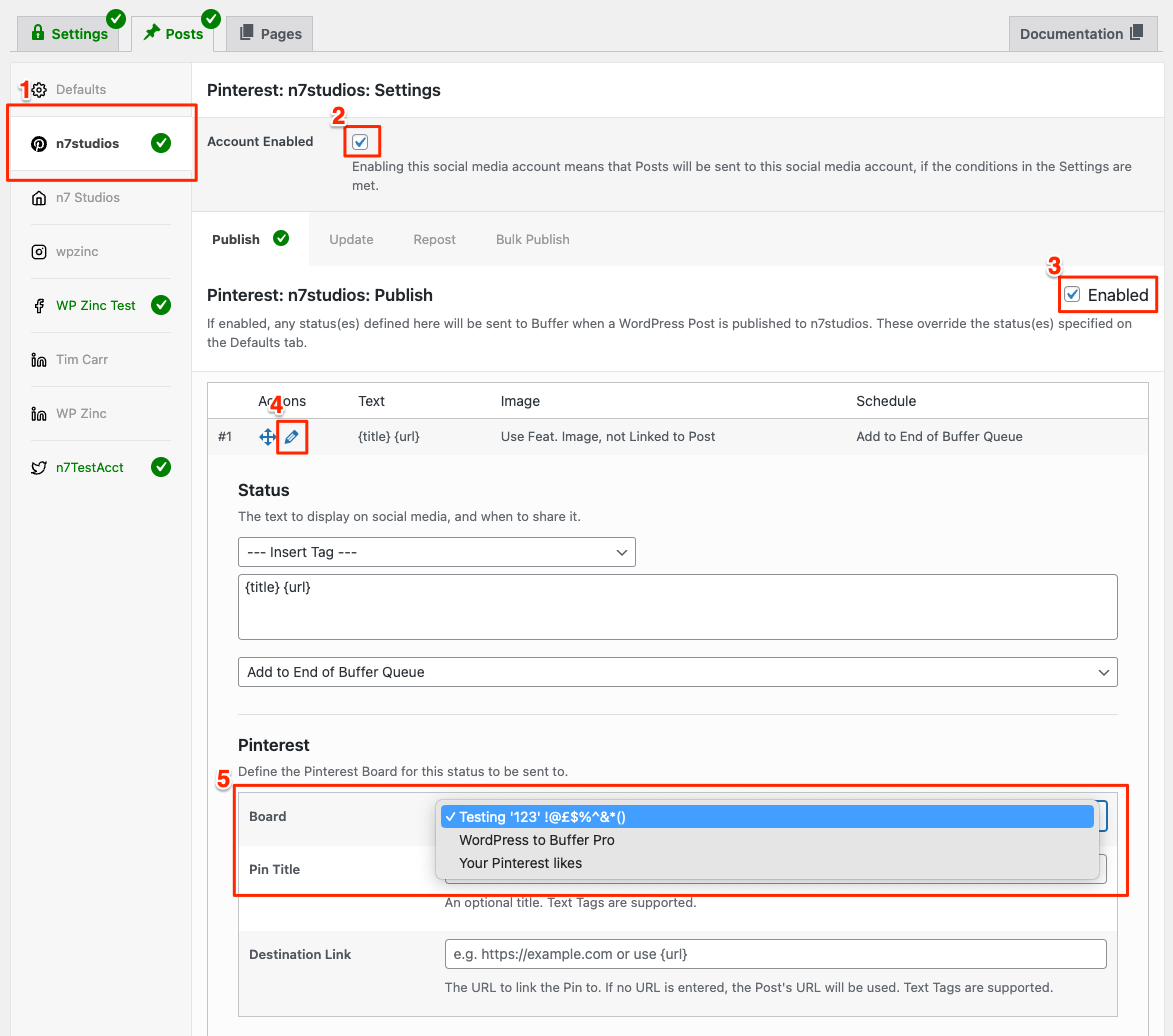
To post to a Pinterest board:
- Click on the applicable Pinterest profile in the settings for the Post Type:
- Tick the Account Enabled option
- Tick Enabled for the applicable action (publish, update, repost, bulk publish)
- Add / edit a status, choosing a Board from the dropdown:
If you don’t see a dropdown field, you’ll most likely see the following message:
To add a Board to Pinterest:
- Follow these instructions to add a Board to Pinterest. It’s best to add all of the Boards that you might use.
- In Buffer, remove the Pinterest account:
- Click Manage Channels
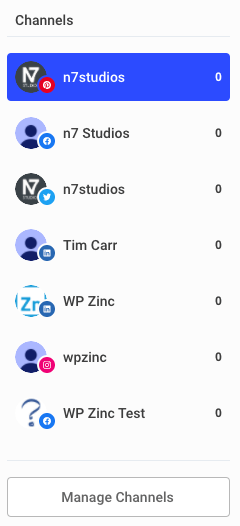
- Click Manage next to the Pinterest account

- Click Remove

- Click Confirm and Disconnect
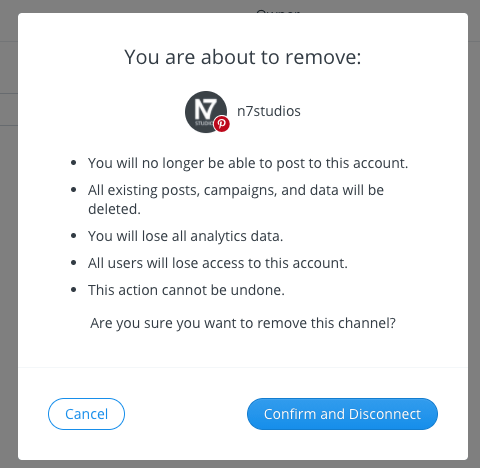
- Click Manage Channels
- In Buffer, add the Pinterest account:
- Click Add a New Channel

- Click Pinterest

- Click Give access
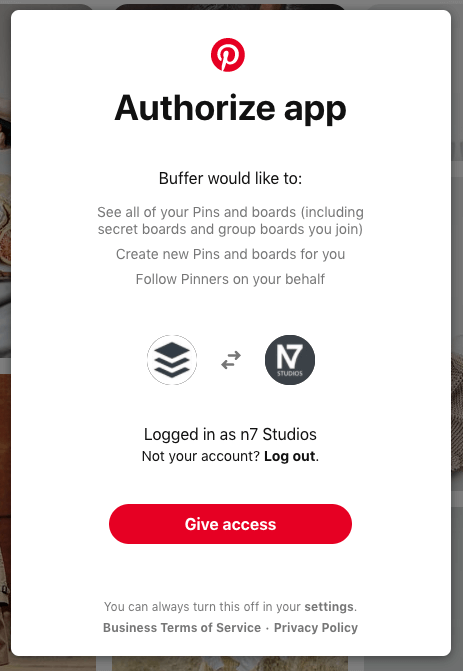
- Click Add a New Channel
- In the Plugin
- Save your statuses
- Reload the settings screen
- The Pinterest Board dropdown option should now display.

Additional options are displayed below the Schedule setting:
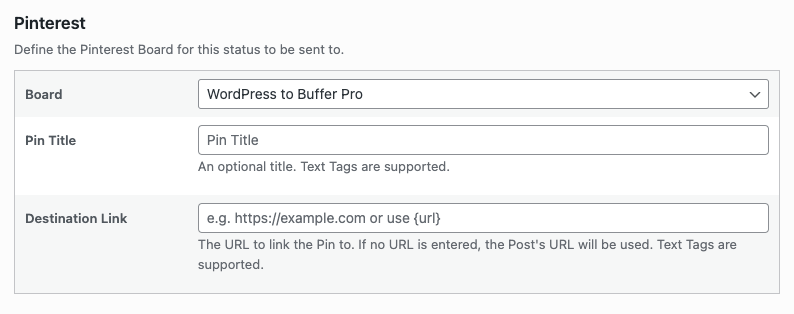
- Board: Select the Pinterest Board to send this status to.
- You must select a Pinterest Board.
- Pin Title: Optionally define the Pin’s title.
- If defined, will display as the Title when viewing the individual Pin in Pinterest, above the status text:

- If defined, will display as the Title when viewing the individual Pin in Pinterest, above the status text:
- Destination Link: Optionally define where the Pin should link to when published on the Pinterest Board
- If no URL is entered, the WordPress Post’s URL will automatically be used.
Status: Google Business Profile
When adding or editing statuses under a Google Business Profile tab, additional settings are displayed:

These are optional, but recommended to provide the best possible status update to Google.
What’s New

- Post Type: What’s New
- Call to Action: The button label to use, which will link to the Post.
- These are predefined options provided by Google and Buffer, therefore freeform text for the button is not an option.
Offer
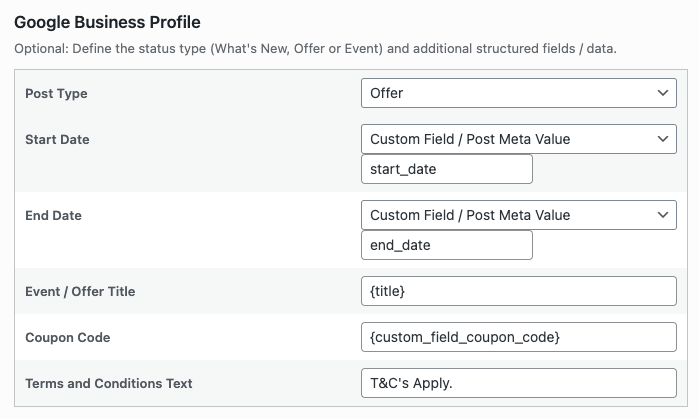
- Post Type: Offer
- Start Date: When the offer starts
- This must be a Post Custom Field’s value.
- The value must be a date in the future, comprising of either a timestamp or yyyy-mm-dd hh:ii:ss format
- If no Post Custom Field is specified, a value must be specified using the Per-Post Settings.
- End Date: When the offer ends
- This must be a Post Custom Field’s value.
- The value must be a date in the future, comprising of either a timestamp or yyyy-mm-dd hh:ii:ss format
- If no Post Custom Field is specified, a value must be specified using the Per-Post Settings.
- Event / Offer Title: The name / title for the coupon.
- Status Tags can be used here, such as the Post’s Title.
- Coupon Code: An optional coupon code to include for the offer.
- Terms and Conditions: The text to display as the terms and conditions for the offer
Event
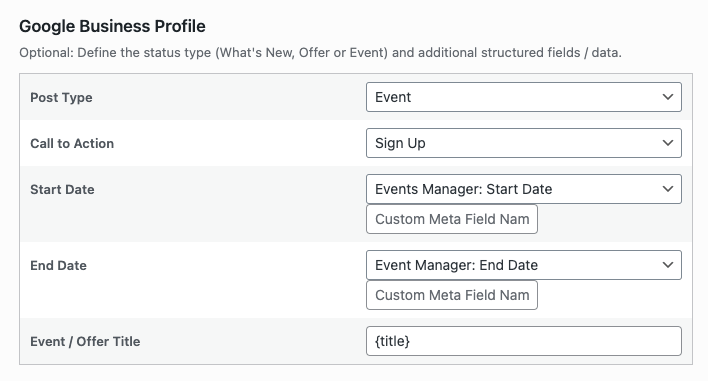
- Post Type: Event
- Call to Action: The button label to use, which will link to the Post.
- These are predefined options provided by Google and Buffer, therefore freeform text for the button is not an option.
- Start Date: When the event starts
- This must be either:
- A Post Custom Field’s value,
- For an Event Post Type registered by a supported Events Plugin, the Event’s Start Date
- The value must be a date in the future, comprising of either a timestamp or yyyy-mm-dd hh:ii:ss format
- If no Post Custom Field is specified, a value must be specified using the Per-Post Settings.
- This must be either:
- End Date: When the event ends
- This must be either:
- A Post Custom Field’s value,
- For an Event Post Type registered by a supported Events Plugin, the Event’s End Date
- The value must be a date in the future, comprising of either a timestamp or yyyy-mm-dd hh:ii:ss format
- If no Post Custom Field is specified, a value must be specified using the Per-Post Settings.
- This must be either:
- Event / Offer Title: The name / title for the coupon.
- Status Tags can be used here, such as the Post’s Title.
Status: Image
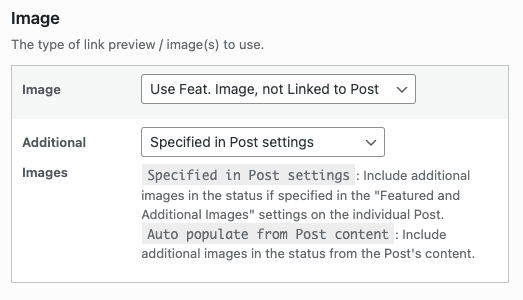
To define the image(s) to attach to the social media post, select an applicable option:
- No Image (i.e. No Link Preview)
- Use OpenGraph Settings (links to the WordPress Post, with the image based on your SEO Plugin’s og:image property)
- Use Feat. Image, Linked to Post
- Use Feat. Image, not Linked to Post
- Use Text to Image, Linked to Post
- Use Text to Image, not Linked to Post
Not all social networks support all options, as detailed below.
| No Link Preview | Use OpenGraph Settings | Use Feat. Image, Linked to Post | Use Feat. Image, not Linked to Post | Use Text to Image, Linked to Post | Use Text to Image, not Linked to Post | |
|---|---|---|---|---|---|---|
| Yes | Yes | Yes | Yes | Yes | Yes | |
| No | No | No | Yes | No | Yes | |
| X / Twitter | No | Yes | No | Yes | No | Yes |
| Yes | Yes | Yes | Yes | Yes | Yes | |
| No | No | No | Yes | No | Yes | |
| Google Business | No | No | No | Yes | No | Yes |
| Mastodon | No | Yes | No | Yes | No | Yes |
| Threads | Yes | Yes | Yes | Yes | Yes | Yes |
| Bluesky | Yes | Yes | Yes | Yes | Yes | Yes |
For a deeper understanding of each option, refer to the Link Previews and Images documentation.
If the image setting for the status has been set to Use Featured Image, not Linked to Post, an option is displayed below called Additional Images, with two choices:
- Specified in Post settings: Only include additional images in the status if images are specified in the Featured and Additional Images settings on the individual WordPress Post
- Auto populate from Post content: As above, but also includes images from the Post content, up to the maximum number of images supported for the social network.
Status: Text to Image
If the image setting for the status has been set to either Use Text to Image, Linked to Post or Use Text to Image, Not Linked to Post, an option called Text to Image is displayed, allowing you to specify some text.
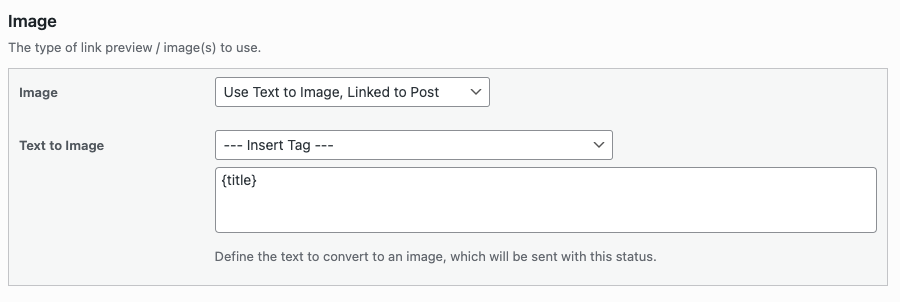
This text is then converted to an image, and the image is included with the status when scheduled on social media: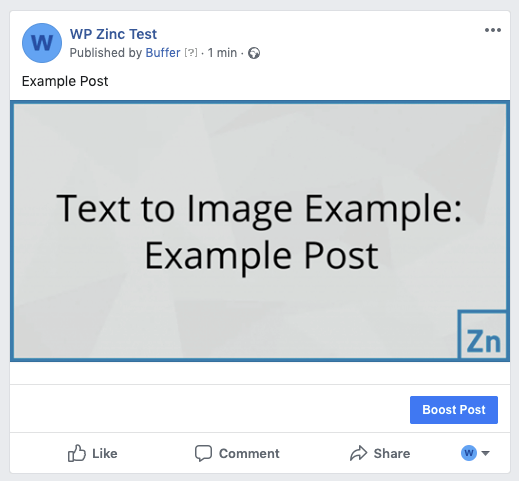
This is useful if, for example, you want to schedule statuses to a Social Media profile that requires images (e.g. Instagram or Pinterest), but your Post might not support Featured Images, or you might not want to use Featured Images.
For color, background image and text styling options, refer to the global Text to Image Settings.
Status: Conditions
For each status update, you can conditionally choose to send the status to Buffer based on certain Post parameters, such as the Post’s date range, Author, Taxonomy Terms and/or Custom Field Values.
To do this, navigate to the Post Conditions section of the status.
Status: Conditions: Post
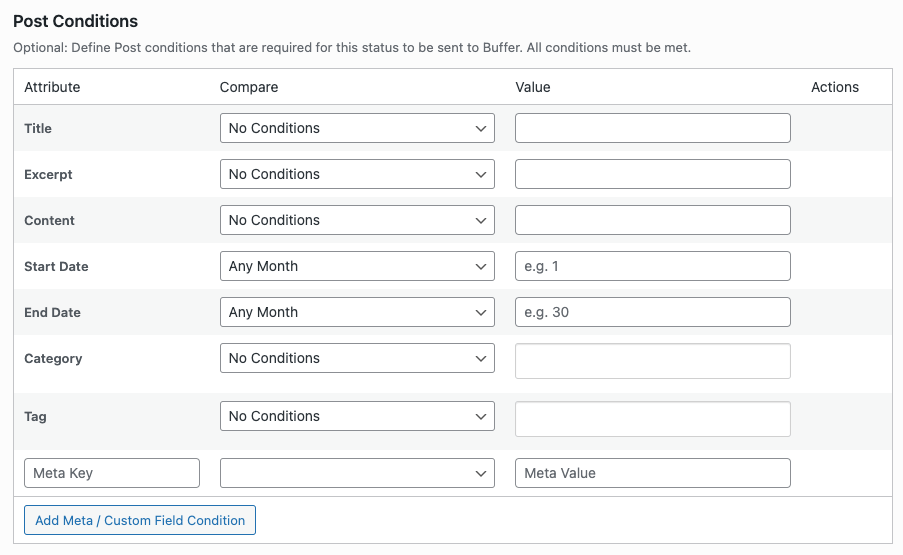
For each status update, you can conditionally choose to send the status to Buffer based on whether a Post has (or does not have) values for the Post Title, Excerpt and/or Content.
This is useful if, for example:
- Your status message uses the {content} tag, but the Post doesn’t have any Content (perhaps published in error),
- You want to define multiple statuses, each with different text, depending on whether the Post Title contains a specific keyword
To define Post Title, Excerpt and/or Content conditions for a status update, the following options are available:
- Key: Post Title, Excerpt or Content
- Compare: The method used to compare the Post’s custom field value to the Value below.
- Value: The value to compare.
The available comparison methods are:
| Comparison Method | Description |
|---|---|
| Equals | The Post’s Title/Excerpt/Content must exactly match the Value given |
| Does Not Equal | The Post’s Title/Excerpt/Content must be different from the Value given |
| Greater Than | The Post’s Title/Excerpt/Content must be greater than the Value given. This only works with numeric values. |
| Greater Than or Equal To | The Post’s Title/Excerpt/Content must be greater than or equal to the Value given. This only works with numeric values. |
| Less Than | The Post’s Title/Excerpt/Content must be less than the Value given. This only works with numeric values. |
| Less Than or Equal To | The Post’s Title/Excerpt/Content must be less than or equal to the Value given. This only works with numeric values. |
| In | The Post’s Title/Excerpt/Content must exactly match one of the given Values. Multiple Values are comma separated. |
| Not In | The Post’s Title/Excerpt/Content must not match all of the given Values. Multiple Values are comma separated. |
| Like | The Post’s Title/Excerpt/Content must contain/partially match the given Value. |
| Not Like | The Post’s Title/Excerpt/Content must not be equal to and not contain/partially contain the given Value. |
| Empty | The Post’s Title/Excerpt/Content has no value. The Value field is ignored. |
| Not Empty | The Post’s Title/Excerpt/Content has any non-empty value. The Value field is ignored. |
For example, to only have a status be sent to Buffer when the Title has any value:
- Attribute: Title
- Compare: Not Empty
- Value: (leave blank)
For example, to only have a status be sent to Buffer when the Excerpt contains the word “hello”:
- Attribute: Excerpt
- Compare: Like
- Value: hello
For example, to only have a status be sent to Buffer when the Title is either “Title1” or “Title2”:
- Attribute: Title
- Compare: In (Comma Separated Values)
- Value: Title1,Title2
Status: Conditions: Dates
For each status update, you can conditionally choose to send the status to Buffer based on whether a Post falls between two given dates.
This is useful if, for example:
- You only want to send statuses for Posts in a specific month (or months),
- You want to define multiple statuses, each with different text, but only have one status send depending on the Post’s date.
To define date conditions for a status update, complete the following fields:
- Start Date:
- Compare: Choose a month
- Value: Enter the day, as a number
- End Date
- Compare: Choose a month
- Value: Enter the day, as a number
To remove date conditions:
- Leave the Day fields blank
- Select Any Month from the Month dropdowns
Status: Conditions: Taxonomies
For each status update, you can conditionally choose to send the status to Buffer based on whether a Post has (or does not have) specific Taxonomy Terms (categories, tags etc).
This is useful if, for example:
- You want to send different status updates for a Post depending on the Post Category,
- You do not want to send status updates for a Post belonging to a specific Category,
- You want to send different status updates to different Pinterest boards depending on the Post Category
To define conditions for a status update:
- Compare: Choose a comparison method
- No Conditions
Do not apply any conditions to this status update for the given Taxonomy. - Post(s) must include ANY Terms
The Post must have at least one of the Taxonomy Terms you specify, for the status update to be sent to Buffer. - Post(s) must include ALL Terms
The Post must have all of the Taxonomy Terms you specify, for the status update to be sent to Buffer. - Post(s) must exclude ANY Terms
The Post must not have any of the Taxonomy Terms you specify. If the Post does contain one or more of the Taxonomy Terms you specify, the status update will not be sent to Buffer.
- No Conditions
- Value
- In the text input beside the Compare dropdown option, start typing the Taxonomy Term Name(s) that you require for this condition.
- As you start typing, your existing Taxonomy Term Name(s) will appear in the list. Click on a term to add it.

- To remove an existing Taxonomy Term, click the small cross to the left of the term

Click Save to update your settings.
Status: Conditions: Polylang
If using the Polylang Plugin for multilingual WordPress web sites, you can conditionally choose to send a status to Buffer based on the Post’s language, by using the Language taxonomy:
This is useful if you want to specify language-specific statuses, or only send a status based on the Post’s language.
Status: Conditions: WPML
If using the WPML Plugin for multilingual WordPress web sites, you can conditionally choose to send a status to Buffer based on the Post’s language, by using the WPML condition:
This is useful if you want to specify language-specific statuses, or only send a status based on the Post’s language.
Status: Conditions: Custom Fields
For each status update, you can conditionally choose to send the status to Buffer based on whether a Post has (or does not have) Custom Field Values (sometimes referred to as Meta Key values). More than one rule can be specified per status, and each rule can have different comparison operators for the same or different Custom Fields.
This is useful if, for example:
- You want to send different status updates for a Post depending on the value of a Custom Field, such as an Advanced Custom Field value or meta key value,
- You do not want to send status updates for a Post where a meta key value is missing (such as your SEO Plugin’s Title field)
To define conditions for a status update, use the Custom Fields table:
- To add additional conditions, click the Add Meta / Custom Field Condition button.
- To remove an existing condition, click the Remove button for the row you want to remove.
For each condition, the following options are available:
- Key: The Custom Field (meta key) to inspect
- Compare: The method used to compare the Post’s custom field value to the Value below.
- Value: The value to compare.
The available comparison methods are:
| Comparison Method | Description |
|---|---|
| Equals | The Post’s Meta Key’s Value must exactly match the Value given |
| Does Not Equal | The Post’s Meta Key’s Value must be different from the Value given |
| Greater Than | The Post’s Meta Key’s Value must be greater than the Value given. This only works with numeric values. |
| Greater Than or Equal To | The Post’s Meta Key’s Value must be greater than or equal to the Value given. This only works with numeric values. |
| Less Than | The Post’s Meta Key’s Value must be less than the Value given. This only works with numeric values. |
| Less Than or Equal To | The Post’s Meta Key’s Value must be less than or equal to the Value given. This only works with numeric values. |
| In | The Post Meta Key’s Value must match one of the given Values. Multiple Values are comma separated. |
| Not In | The Post Meta Key’s Value must not match all of the given Values. Multiple Values are comma separated. |
| Like | The Value given must be equal to, or within, the Post’s Meta Key’s Value. |
| Not Like | The Value given must not be equal to and not within the Post’s Meta Key’s Value. |
| Empty | The Post’s Meta Key exists, but has no value. The Value field is ignored. |
| Not Empty | The Post’s Meta Key exists, and has any non-empty value. The Value field is ignored. |
| Not Exists | The Meta Key must not be specified on the Post. The Value field is ignored. |
For example, to only have a status be sent to Buffer when the Custom Field yoast_seo_title has any value:
- Attribute: yoast_seo_title
- Compare: Does Not Equal
- Value: (leave blank)
For example, to only have a status be sent to Buffer when the Custom Field price is greater than 10, and the Custom Field quantity is greater than or equal to 1:
- Attribute: price
- Compare: Greater Than
- Value: 10
- Attribute: quantity
- Compare: Greater Than or Equal To
- Value: 1
For example, to only have a status be sent to Buffer when the Custom Field _location_id matches 1 or 2:
- Attribute: _location_id
- Compare: In (Comma Separated Values)
- Value: 1,2
Status: Conditions: Authors
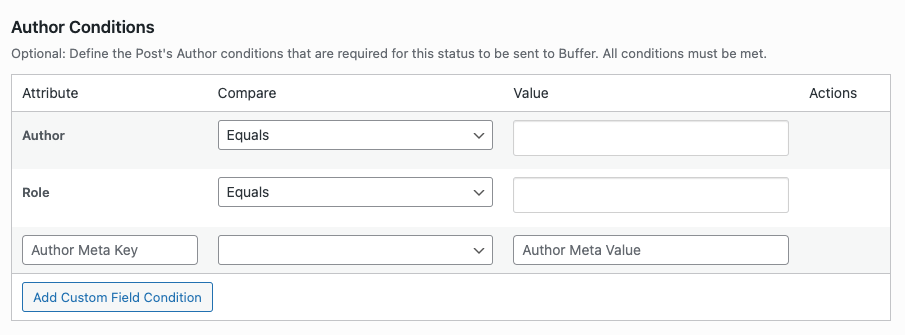
- A Post’s Author matches one or more given specified Authors (WordPress Users),
- A Post’s Author matches one or more given specified Roles,
- A Post’s Author user metadata
For each status update, you can conditionally choose to send the status to Buffer based on:
This is useful if, for example:
- You only want to send statuses for Posts belonging to specific Authors,
- You want to define multiple statuses, each with different text, depending on whether an Author has specific metadata.
Authors
To define Author conditions for a status update:
- Compare: Choose a comparison method
- Equals
The Post’s Author must match one of the Value(s) specified, for the status update to be sent to Buffer. - Does Not Equal
The Post’s Author must not match all of the Value(s) specified, for the status update to be sent to Buffer.
- Equals
- Value
- In the text input beside the Compare dropdown option, start typing the User / Author Name(s) that you require for this condition.
- As you start typing, matching Author usernames will appear in the list. Click on an Author to add it.

- To remove an existing Author, click the small cross to the left of the username

Roles
To define Author Role conditions for a status update:
- Compare: Choose a comparison method
- Equals
The Post’s Author’s Role must match one of the Value(s) specified, for the status update to be sent to Buffer. - Does Not Equal
The Post’s Author’s Role must not match all of the Value(s) specified, for the status update to be sent to Buffer.
- Equals
- Value
- In the text input beside the Compare dropdown option, start typing the Role Name(s) that you require for this condition.
- As you start typing, matching Roles will appear in the list. Click on a Role to add it.

- To remove an existing Role, click the small cross to the left of the role

Custom Fields
To define conditions for a status update, related to the Post’s Author, use the Custom Fields table:
- To add additional conditions, click the Add Custom Field Condition button.
- To remove an existing condition, click the Remove button for the row you want to remove.
For each condition, the following options are available:
- Key: The Custom Field (author/user’s meta key) to inspect
- Compare: The method used to compare the Author’s custom field value to the Value below.
- Value: The value to compare.
The available comparison methods are:
| Comparison Method | Description |
|---|---|
| Equals | The Author’s Meta Key’s Value must exactly match the Value given |
| Does Not Equal | The Author’s Meta Key’s Value must be different from the Value given |
| Greater Than | The Author’s Meta Key’s Value must be greater than the Value given. This only works with numeric values. |
| Greater Than or Equal To | The Author’s Meta Key’s Value must be greater than or equal to the Value given. This only works with numeric values. |
| Less Than | The Author’s Meta Key’s Value must be less than the Value given. This only works with numeric values. |
| Less Than or Equal To | The Author’s Meta Key’s Value must be less than or equal to the Value given. This only works with numeric values. |
| In | The Author Meta Key’s Value must match one of the given Values. Multiple Values are comma separated. |
| Not In | The Author Meta Key’s Value must not match all of the given Values. Multiple Values are comma separated. |
| Like | The Value given must be equal to, or within, the Author’s Meta Key’s Value. |
| Not Like | The Value given must not be equal to and not within the Author’s Meta Key’s Value. |
| Empty | The Author’s Meta Key exists, but has no value. The Value field is ignored. |
| Not Empty | The Author’s Meta Key exists, and has any non-empty value. The Value field is ignored. |
| Not Exists | The Meta Key must not be specified on the Author. The Value field is ignored. |
For example, to only have a status be sent to Buffer when the Custom Field facebook has any value:
- Attribute: facebook
- Compare: Does Not Equal
- Value: (leave blank)
Save Statuses
To save changes:
- Click the blue Update button if you’re editing a status

- Click the blue Save button towards the bottom of the screen

On screen conformation will be displayed showing that the status settings have been saved.
Per-Profile Status Settings
For each Social Media Profile, it’s possible to define different status(es) with their own unique settings.
To do this:
- Navigate to the Post Type

- Click on the Profile (in this case, the WP Zinc Test Facebook Page):
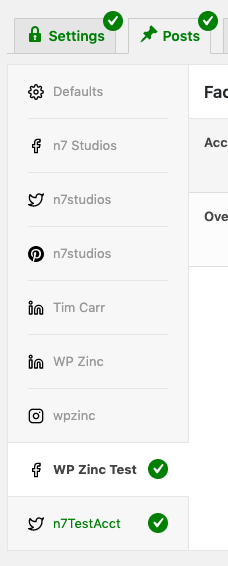
- Tick both the Account Enabled and Override Defaults options
- Click the applicable Post Action tab (Publish, Update, Repost, Bulk Publish), depending on when you want the status(es) to be sent:
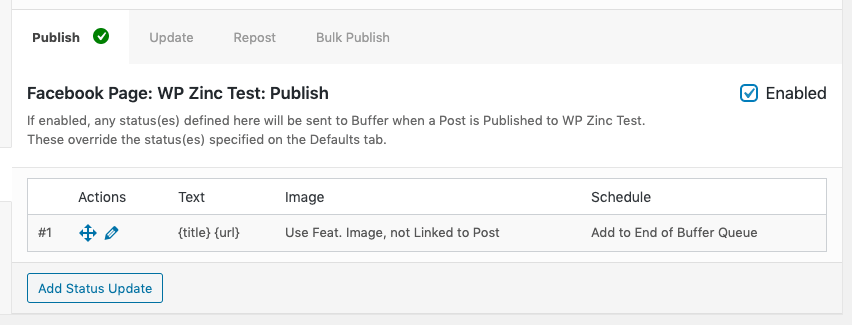
- Tick the Enabled option
- Add, edit, delete or re-order statuses as necessary, referring to the above Documentation.
These status settings will then be used for status(es) for the given specific social media profile.
Testing
Sometimes Publishing or Updating a Post, Page or Custom Post Type may (or may not) send statuses as expected.
WordPress to Buffer Pro’s Test Mode allows you to test your Plugin and status(es) configuration, logging the result as if a status would be sent to Buffer, without actually sending it.
1. Enable Test Mode
Enable Test Mode in the Plugin’s Settings.
2. Enable Logging
Enable Logging in the Plugin’s Settings.
3. Test: Publish or Update
In the WordPress Administration, either publish the Post in question, or update the existing published Post, depending on which action you want to test.
In WP to Buffer Pro > Logs, filter by Result = Test:
You’ll see status(es) that would have been sent. Make a note of any errors or issues, and make configuration changes as necessary to resolve: