WordPress to Buffer Pro provides a manual option for you to:
- Choose one or more Post(s),
- Send the status(es) defined for the Post Type under the Bulk Publish action.
Bulk Publish statuses are best for reviving (reposting) old Posts on a one time basis, that you’re not likely to update the content of very often.
Define Status Updates
To set your status messages for bulk publishing:
- In the WordPress Administration, click on the WP to Buffer Pro > Settings in the menu.
- Click on the Post Type tab you’ll be Bulk Publishing
- Define your default status settings, and optionally define per-profile settings, under the Bulk Publish action.
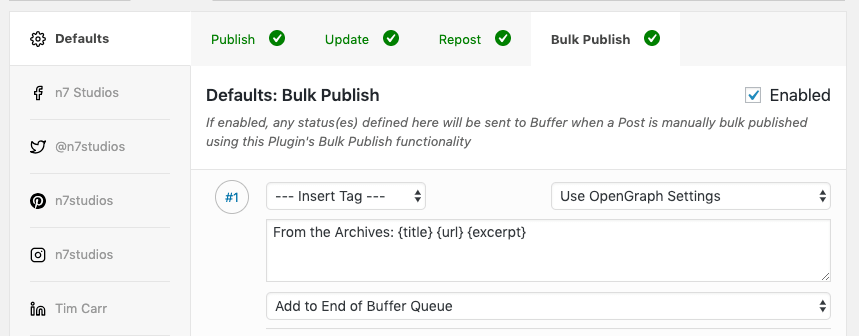 Refer to the Status Settings Documentation for more information on defining statuses.
Select Posts to Bulk Publish through WordPress
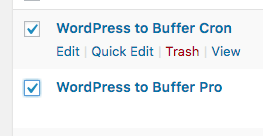
When viewing a list of Posts, Pages or Custom Post Types:
- Click the checkbox beside each Post you want to send to Buffer
- Under the Bulk Actions dropdown, choose the Send to Buffer option
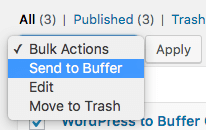
- Click Apply
You will then be taken to WordPress to Buffer Pro’s Bulk Publish screen, where you can confirm the Post(s) you have selected. This is documented below.
Select Posts to Bulk Publish through the Plugin
Click on WP to Buffer Pro > Bulk Publish
1. Choose a Post Type
Click on the Post Type tab, relevant to the Post Type you want to publish in bulk
2. Choose / Filter Post(s)
Next, we’ll query our Post Type to get a subset of Posts that we can then choose to publish to Buffer. Several filters are available, which allow you to determine the Post(s) that you want to select for Bulk Publishing to Buffer.
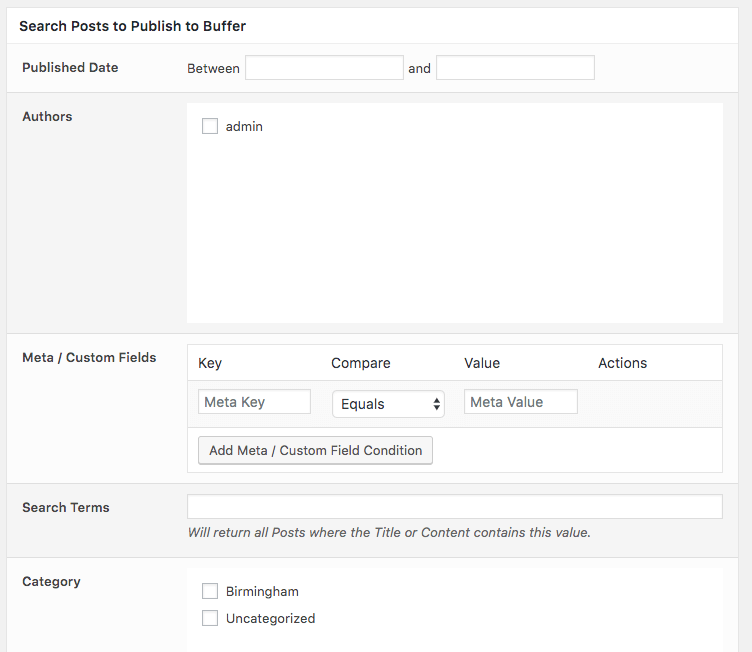
Published Date
Click on the date fields, and use the datepicker to choose the start and end publication dates.
Author
To only publish Posts to Buffer written by specific Author(s), select them by clicking the checkbox beside their username.
Meta / Custom Fields
To only publish Posts to Buffer that contain specific Post Meta (or “Custom Field”) data, use this option
To add a Meta Key / Value constraint:
- Click the Add Meta / Custom Field Condition Button
- Key: The Post Meta Key to search
- Compare: How to compare the Value
- Value: The Value required (or not required, depending on the Compare option above)
To remove an existing Meta Key / Value constraint, click the Remove button beside the Key/Value pair.
Search Terms
Posts will only be published to Buffer if their Title or Content contain the given search term(s).
If you’re looking to restrict Posts by Page Builder or Advanced Custom Fields data, you’ll need to use the Meta / Custom Fields option above with the ‘LIKE’ comparison. Most Page Builders / ACF data is stored in Post Meta, meaning the Search Terms options here will not apply.
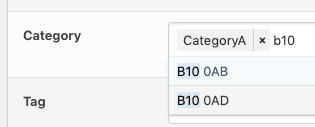
Taxonomy Terms
Depending on your Post Type, you’ll see options to select Terms for e.g. Categories, Tags. Posts will only be included for publication if they match any of the chosen term(s).
To add Term(s):
- Start typing in the Taxonomy field for the Term
- Select the Term from the dropdown list
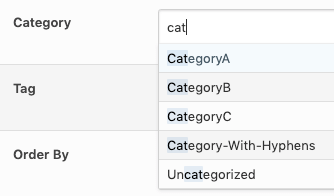
- Repeat for additional Term(s) that you require for the Post to be included for publication
Order
- Order By: Defines how to order Posts that will be added to your Buffer queue.
- Order: Defines the order in which Posts will be processed and added to your Buffer queue. This is used in combination with the Order By setting – for example, you can choose to send Posts to Buffer starting with the oldest published date first.
Click Choose Posts
3. Select which Post(s) to publish to your Buffer account
Based on the query conditions entered above, or the Posts chosen in the Post Edit screen, you’ll now see any matching Post(s):
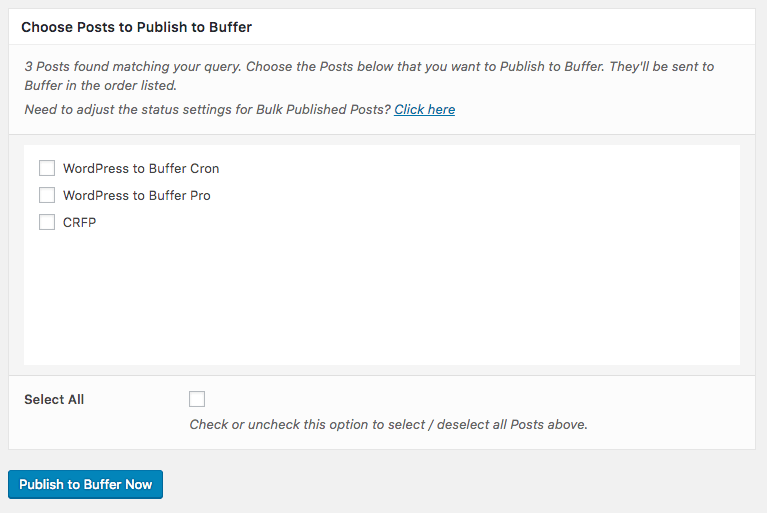
Either use the Select All option to choose to publish all Posts to Buffer, or use the checkboxes beside the Post(s) you want to publish to Buffer.
Click Publish to Buffer Now to publish the selected Post(s) to Buffer.
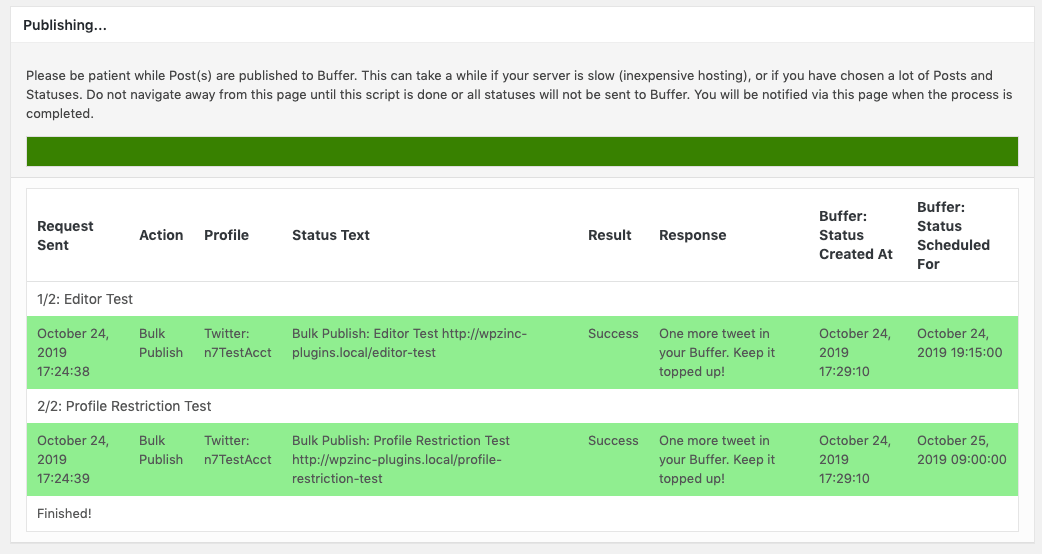
Publishing Progress
WordPress to Buffer Pro will display on screen progress whilst it publishes each of your Post(s) to Buffer. Make sure you don’t close your browser window / tab until this process is complete.
For each Post and status, you’ll see an on screen message confirming whether publication succeeded or not.
Programmatically Bulk Publish
To programmatically Bulk Publish Posts to Buffer, without having to user the above interface, refer to the WP-CLI documentation.
Testing
Sometimes Bulk Publishing Posts, Pages or Custom Post Types may (or may not) send statuses as expected.
WordPress to Buffer Pro’s Test Mode allows you to test your Plugin and status(es) configuration, logging the result as if a status would be sent to Buffer, without actually sending it.
1. Enable Test Mode
Enable Test Mode in the Plugin’s Settings.
2. Enable Logging
Enable Logging in the Plugin’s Settings.
3. Test: Bulk Publish
In the WordPress Administration, either:
In WP to Buffer Pro > Logs, filter by Result = Test:
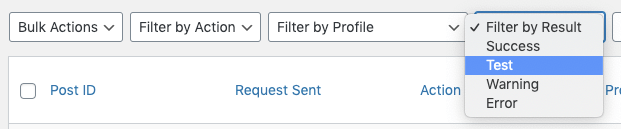
You’ll see status(es) that would have been sent. Make a note of any errors or issues, and make configuration changes as necessary to resolve:
